Showing posts with label Tips. Show all posts

April 11, 2009

Why I think it's time for Avon

It has been six months since I last posted, and there are many reasons for it, not the least of which is just life happens. Also, I have been seriously considering where I want to take this blog, and what it comes down to is that I believe there are many wonderful blogs covering crafts, decorating, recipes, and tips as well as, or better, than I can. In the end I have a passion for helping people get answers, and find ways to make their lives easier or more enjoyable, but I may be transitioning this blog into something new that is more encompassing of what that really means in a way that goes beyond just "home ec" topics.

So, until that plan comes together, I wanted to fill you in on what's new here.


I just became an Independent Sales Representative for Avon. And you may be wondering WHY!?

Well, besides being a woman who grew up with Avon (what woman growing up in the 70s didn't?), there are a couple of big reasons, and I thought I'd share.

I recently went to an In-Store Marketing Institute seminar (for my day job), a three day event that brings together retailers, marketing professionals, and manufacturers to share industry trends, news, and strategies to market to "shoppers" - which is all of us!! A major topic in every session I attended was the economy and how it is affecting our shopping behavior. Apparently I'm not the only one that is cutting back and returning to the basics in order to save money. While brands and marketers are out there trying to figure out how to get us to spend our precious few dollars, we are just trying to figure out how to pay the bills without having to give up anything we need.

This is one of the big reasons I decided to become an Avon rep. These are great products and great values. Don't believe me? Email me and I will send you a chart comparing Avon products with some department store brands - including some I used - that will show you exactly how much you will be saving if you switch. Here's an example. I used Clinique repairwear anti-aging makeup, with spf 15, which retails for $28.50. I'm switching to Avon's Anew Age Transforming foundation, also spf 15, that costs $12.50. That is a $16 savings!

I know most women are like me... we love to save money. And when you can save money and not really be giving up on quality, why NOT do it? If it's been a while since you have looked at what Avon has to offer (beauty products, really cool perfume, personal care stuff, kids things, jewelry, clothing, etc etc), just go visit my site at http://www.youravon.com/pollyking.

The truth is, being an Avon rep goes directly to my core desire to help people get what they need and solve some daily problems in a way that frees them up to really focus on what's important in life.

Look for more from me soon.

February 03, 2008

A cordless stick vac that swept me off my feet.


At our house, the laundry room, pantry, half bath, and entrance from the garage are high-traffic areas that need a floor touch-up on a daily basis. The cat litter box necessitates dragging out the broom and dustpan every day, to keep from feeling like we're walking on the beach. Another problem is that I deal with two different floor coverings - some vinyl and some carpet - so a broom alone won't cut it.

Enter the Dirt Devil Quick Power cordless stick vac. This lightweight little devil has a rotating brush so it works on carpet, or you can turn the brush off for hard surface floors. On vinyl, it easily picks up scattered litter, and on carpet it does a good job of picking up pet hair. Its bagless design allows me to empty the collection thingy after every sweep. I just wipe it out with a damp paper towel after dumping and put it right back on, so it's ready the next day (or in the next few minutes, depending). I keep it plugged in so it's always ready, and have never run out of a charge. The low cost was another selling point for me. At just around $30, I felt like the risk was relatively low, and I have been very happy with its performance for that price. Before, it would take me several minutes to run the broom around the vinyl floor and sweep sweep sweep. The carpeted area would only get attention every few days at the most. Now, in a matter of minutes (literally) I've got both vinyl and carpet looking neat and clean.

I don't expect this stick vac to do the job of my big vacuum. But it is perfect for what I use it for - speedy touchups every day.

January 19, 2008

Starring role for a movie night dinner: super easy baked chicken.


Friday night movie night with friends seemed like a good idea at the time. Tuesday night we decided to invite another couple over for dinner and a movie (3:10 to Yuma (Widescreen Edition)), and I thought I would make dinner. Simple enough, right? As the week wore on, I started thinking it was a mistake. Friday I would still have to work a full day, then I'd have to go home, tidy up the house, and make a good dinner for the four of us, keeping in mind that we'd need to eat relatively early so that we weren't starting the movie too late. Panic set in. How was I going to pull this off without getting stressed or making a ho hum meal.

I did a little research on some recipe sites (All Recipes and Food Network), and got some ideas for a menu. My strategy was to keep it simple, adding flavor and variety without adding to the labor. I settled on what The Bob called "chicken, mashed potatoes, and green beans." But I called "Baked Chicken with Cheese and Creamy Sauce, The Most Delicious Green Beans Ever, and Twice Baked Potatoes Only Not Really."

Here's the recipe for the chicken... (Look for the other two recipes in future posts.)

Here's what you need:
4 boneless, skinless chicken breasts
Poultry seasoning
1/4 lb. Gruyere cheese, shredded (on the large holes of a box grater)
1 can cream of celery soup
1/4 c. water
About 2 c. herb seasoned stuffing mix
1/2 stick butter, melted

Here's all you do:
1. Preheat oven to 350 degrees. Spray a rectangular casserole with non-stick spray. Place chicken side by side in dish (in mine they just fit the pan, touching) and sprinkle with poultry seasoning (eyeball it). Cover the chicken with the shredded cheese, evenly covering all the breasts.
2. Combine the soup and the water and pour over the chicken and cheese. Take a couple big handfuls of the stuffing mix, crush in your hands and sprinkle over all. Drizzle with the butter.
3. Bake for anywhere from an hour to an hour and a half. Mine took an hour and a half, because they were really large chicken breasts. Let them sit for about 7-10 minutes. Serve them up and take the compliments!

This chicken literally took me 5 minutes to throw together and put in the oven. That gave me time to get the "Twice Baked Potatoes Only Not Really" ready for the oven (I put them in the oven 30 minutes into the chicken cooking time). The Most Delicious Green Beans Ever came together on the stove top and cooked away while I freshened up.

By the time the doorbell rang, I had everything under control so we could visit with our friends and have a little appetizer (bar cheese and pita chips... store bought lovelies) while dinner finished up. It was a hit.

Notes on this recipe. You could substitute slices of Swiss cheese for the Gruyere. I intend to use this as a base recipe and mix up the ingredients, but keep the method the same. Cream of chicken, or even cream of mushroom soup would work. I'll use whatever kind of cheese I have on hand - smoked cheddar or swiss would be good. I'm thinking of a Tex-Mex take on this with Monterey Jack cheese and nacho cheese soup mixed with a little salsa. Or an Italian version with mozzarella cheese and a pasta sauce instead of the soup. In my mind the non-negotiables are the bread crumb or stuffing topping and the butter. (No, this isn't exactly diet food, folks!)

No more sweating a Friday movie night dinner with friends when I have something this easy and quick, not to mention delicious, in my arsenal! Try it and let me know if it works for you!

September 28, 2007

10 Random Tips that Save Time, Energy, and Frustration


After a very busy and eventful summer, I am happy to be back and healthy and ready to start bringing you more ideas, hints, tips, recipes, and rantings.

Here are a quick 10 super-easy tips that you can incorporate to save yourself time, energy, and frustration. They aren't complicated, and they work for me.

1. Say it, don't spray it. To keep non-stick spray from getting your counters sticky, place your dish on the open door of your dishwasher and then spray away. The overspray will just go on the back of the door, which will be clean next time you run the dishwasher.

2. Pick a pepper.
Next time you have an extra red, yellow, or green pepper languishing in the produce drawer in your fridge, don't let it go to waste, roast it. When we have the grill going and have an extra pepper, we throw it on, even if we don't plan to use it that day. Put it over the hot part of the grill and turn it every now and then until the skin is mostly black. Put the pepper in a plastic container and refrigerate until you're ready to use it. Then just slip the skin off, take out the seeds and membranes, and slice or chop to use in your recipe. The pepper will keep in the fridge for a few days.

3. In the fold.
This may sound like your mom, and if so, I apologize. Fold your underwear. No, I'm not joking. Years ago I just shoved my panties in a drawer willy nilly. I had to paw through the pile to find the color I wanted, and it took more time. Besides that, it was unpleasant aesthetically. I promise you, it only takes 2 seconds to fold a pair of panties (and coincidentally, it takes 2 seconds to fold a pair of The Bob's boxers), and I promise, when you open that tidy drawer you will feel good, and you'll find what you're looking for more quickly.

4. Lost and found. I read cookbooks for fun (I don't think that makes me strange at all!), and, of course, to get ideas. When I sit down with a cookbook I always have a pack of those little tape flags next to me so that when I see something interesting, I can just mark it. That way, instead of getting frustrated wondering, "Now where did I see that recipe," I can just quickly flip to the marked pages.

5. Fill 'er up.
Always fill the tank in your car. Now, I know there are people who will play the "gas price lottery" and try and wait until the price is lower to fill up. They just put a few dollars in at a time until they see a price they like. If you're one of those people, more power to you. The way I look at it, if I go back to the station several times a week to put a few more dollars worth in the tank, then it's costing me in time, which is worth something to me.

6. Iron it out. This is one of those tips that is almost so unconscious for me I don't know that I consider it a "tip." But I guess it is. I keep a water bottle next to the iron and ironing board, so I can fill up the iron when it needs it without having to traipse to the sink every time. One 20 oz. water bottle fills my iron up several times. One trip to the sink instead of 5? I guess that is a tip!

7. That's neat.
Storage under the sink can be scary. It's deep, it's dark, and there are all those pipes and fixtures and stuff. It is necessary to store things under there, but typically what I did was open the door, grab something quick, and slam it without looking. I hated that! So, a while back I came up with a way to keep it neat and organized without spending a bunch of money. Plastic dish pans, which you can pick up at your local dollar store, make neat under-sink bins and cost a fraction of what the under-sink organizers do. They slide in and out out easily, and keep your stuff from falling over and making a mess. For about two bucks, you can have a neat and tidy under-sink area.

8. Sign here. I have a jacket that I love. THE jacket. It's a shaped, denim blazer-type jacket that fits me to a tee, knows where my elbows go, and never needs ironing. I realized about a year ago, that this jacket was getting more action than any other single item in my closet. And for good reason. It looks good, fits great, and goes with everything. I wondered if there was a problem with the fact that I was wearing this jacket 2-3 times a week with various outfits – one day with a black skirt, white shirt, tights and boots - another day with cords, a long sleeve tee and flats. The answer is NO, there's nothing wrong with having a signature piece, something that makes you feel happy and wonderful every time you put it on. Do my coworkers notice that I wear this jacket a bunch? YES, but it is ME, it reflects my personality and because I mix it up, it always looks new. Get yourself a signature piece, whether it's a jacket, a bag, a piece of jewelry, or a pair of boots. The bonus is, when you're in doubt, you'll reach for that item, and save yourself time and preserve your sanity.

9. Take five. When I get home from work, no matter how I feel, I take five minutes and... do more work! Fooled you, didn't I!? This is no joke. The problem is, at least for me, if I go home and start to relax, I get tired and lose my motivation to do anything. If I take just five minutes to tidy up, put the coffee cups in the dishwasher (or wash them), clear off the table, and swipe down the bathroom sink, I sail into the evening feeling like things are much more in control. After that, I treat myself to a break before making dinner. Since I have done a little work, I'm that much further ahead. This works, give it a try.

10. You're on your way. I've said it before, I'll say it again. One of my top tips of all time is "Clean as you go." Make it a habit and you will always save yourself time in the long run. While making dinner, take the few seconds to wipe down the counter. While doing laundry, take a second to dust the washer and dryer. After you're finished in the shower, spritz it with daily spray. Little jobs can become major jobs if you wait until it's out of control. (I learned this thanks to my high school job at McDonald's. I guess it wasn't a waste of time after all!)

I hope you'll find some of these helpful, and try one or two out to see if they work for you.

April 11, 2007

Four simple grilling tips that save time and dishes

Despite the fact that it doesn't feel much like spring yet, we have begun grilling season at the King house. The Bob is a charcoal junkie, and we both prefer the flavor over gas grilling. I suspect real reason Bob likes the charcoal grill is the Big Fire, and the fact that he can have a couple of beers while he waits for the coals to be ready. Regardless, grilling is a relaxing, fun and no-fuss way of making a delicious dinner, whether it's just a couple of burgers or shrimp and chicken kebabs.

Over the years I have sometimes been surprised at the pile of dishes that winds up in the sink after grilling out. Washing a huge pile of platters and tongs is not my idea of a relaxing evening. So, along the way I have developed a few time- and and dish-saving strategies.

1. Season your meat right on the butcher paper or Styrofoam tray it came in. This works when it's a dry rub, dry seasoning blend, or even just salt and pepper. Then put the package on a clean platter or tray to take out to the grill. When you've got the meat on the grill, toss the packaging and you've got a clean platter ready for the cooked meat. If you can't use the packaging the meat came in, lay down a length of aluminum foil or waxed paper – it will work the same way. This saves you a dish in clean-up, and also helps you avoid any cross contamination.

2. Zipper-seal bags work the same way for marinades. Throw your meat or veggies in a large zipper-seal bag and let them marinate. When they're ready, don't transfer them out onto a clean dish – instead carry the bag and a clean platter out to the grill. Take the food out of the bag and then toss it (and the marinade) and you have a nice clean platter to put the cooked food on.

3. Foil-wrap veggies for a simple side dish or garnish. Instead of pulling out a pan to cook your veggies, lay out a healthy length of aluminum foil and pile them in the center (use a double layer if your foil isn't the heavy-duty kind). We use this technique for asparagus, onions and peppers, corn, whatever we have. Season right on the foil – butter or olive oil and whatever seasonings you like – then wrap them like a package. Toss them on the grill with your main dish and just check them every now and then. We often take the foil pack inside and just pull the veggies out with tongs rather than dirtying another dish. You could also pile the cooked vegetables alongside the cooked meat on your platter.

4. To save on clean up and reduce the risk of cross contamination, keep a few things handy by the grill. A container of disinfectant wipes are great for not only hands, but sticky tongs and spatula grips. A roll of paper towels is better for the occasional drip than a wet cloth or sponge that would hold bacteria. We keep a trash can right by the grill, too, to save steps and keep the area tidy.

So, relax and enjoy grilling out with these ideas that save on cleanup. You just might find that there's enough time for one more beer while dinner's on the barbecue.

March 30, 2007

Spring decorating ideas on the cheap


When sun is coming up a little earlier every day and I can hear the birds singing, it’s time for me to take a look at my “nest” and give it a quick Spring makeover.

Get organized. I set aside a day when I won't have many interruptions and start by folding up the winter throws and blankets, putting away the dark accessories and taking down the heavy fall/winter curtains. I'm basically emptying the room out to start fresh. Just by doing this I feel the energy coming into the room along with the sunlight, and everything seems larger and more airy. After a quick cleaning and dusting, I take stock of the room, evaluating furniture placement. If moving a couple of things around makes me look at things in a new light, I go for it!

Get inspired. My goal this year for my front two rooms was to replace anything dark with something light and give it a summer cottage feel. I decided to use vintage textiles as my main inspiration – starting with a light pastel wedding ring quilt as a foundation item. The first place I always go "shopping" is my linen closet. I take stock of what I have in the way of blankets or quilts, tablecloths, curtains or panels and pillow covers. Over the years I have gathered quite a collection of "this and that" that can be changed out when I get the urge. Then I wander around the house and look at art, accessories and lamps with my goal in mind. If it's light and "cottage-y" it was a candidate for the Spring makeover.

Get started. My sofa is a deep, rich color which tends to make the room feel darker. By putting the wedding ring quilt with its cream background on the back of the sofa, I instantly brightened the room. From there I went to the window treatments. In place of my faux suede drapes in the front room I hung off-white embroidered sheers I had stored away, and suddenly the window looked like it was wearing a pretty petticoat. I brightened the room even more by using some of my vintage embroidered tablecloths on a couple of dark wood tables. On another dark wood piece I placed a light, floral-patterned vintage tray.

Get creative. Now you can have some fun with the accents. To enhance the comfy cottage feel, I literally piled the sofa with various pillows, in similar textiles – embroidered, white, floral and even ticking stripes. Loads of pillows make the sofa look lighter and more inviting. A couple of little white lamps were brought out of the guest room, and a small white storage bin was put into service as home to an ivy. I brought in an old painting in a lighter frame to replace a darker wood framed piece, then a light cotton throw was tossed onto the armchair. This is the time to experiment – place things then take a step back. Try a couple of different locations until it feels just right. Things start to really come together at this point. (By the way, so far I haven't spent a dime!)

Get the total picture. If two of your rooms flow together, like mine do, it's a good idea to consider both in your makeover. In the study adjacent to my front room, I replaced dark, heavily patterned drapes with chambray sheets – yes sheets – gathered onto the rod. Because they're a solid color, and chambray, they don't look like I stripped a bed to cover a window. They actually give me the feeling of a cute farmer in his chambray work shirt. I have a pile of vintage ladies hankies, which I used as tiebacks, to give the window treatments just a little whimsy. I tossed another old quilt over one of the chairs, and with just those two changes this room now coordinates nicely with the front room.

Get a few new things. Of course part of the fun of a mini home makeover is a few new items to add to the mix. I spent an hour or so in my local Kmart and snagged just a few little things that were nice touches, and didn't break the bank. I picked up two plaid "rag" rugs in light pastels that would pick up the tones in the quilt and still blend well with the color of the sofa. I also grabbed a couple of cute "travel pillows" that were covered in a ticking stripe. I did absolutely nothing to them, they were cute just like they were. I put one in among the pile of pillows on the sofa, and one on the armchair across the room, to tie them together visually. All told, I spent $20.98.

Get happy! When I was finished I stood back and just smiled. My rooms had a fresh, new look with a cottage feel just like I was going for.

If you haven't given your room the Spring treatment, try some of these ideas. It's just like the first time you pull out your favorite flip flops when the weather gets nice. You can suddenly see your toes and it just has to make you smile!

March 29, 2007

Another simple pan sauce, and some thoughts on pantry items


Spring is that time of year when The Bob has many after-work commitments, including baseball practice for a team of 13 and 14 year olds in the Sandy Koufax league. So when he comes home after running the team through its paces, he's usually pretty hungry. Which was the case last night. But, since it's hard to predict his exact arrival time, it is tough to start dinner – or I have to make something that can keep warm indefinitely.

So last night when he hit the door, I didn't really have a plan. I had some thin cut, boneless pork chops that came 6 to the package. The thin cut makes them perfect for a super-fast meal. But what to do with them? I came up with a quick pan sauce with what I had in the fridge, which led me to think about some items to recommend keeping on hand for just such an occasion.

Here's what I did. This is the same technique as for any meat you're going to do a pan sauce with.

Put a couple of tablespoons of olive oil in a big, deep skillet over medium-high heat. Salt and pepper the chops on both sides and when the oil is hot, put them in. Don't move them around. My chops were thin enough that I could basically see when they were ready to turn, which was only about 3 minutes. Flip them and cook another 3 minutes on the other side. Remove them to a plate loosely covered with foil (loose is key - you don't want them to keep cooking or they'll turn tough).

Then, from my fridge I pulled out:

Leftover chicken broth, about 3/4 cup
Butter – about 2T
A jar of capers
Dijon mustard – there was about 1T left in the jar.
Half and half
Parmesan cheese, pre-shredded from the deli
A half a lemon I had leftover from making vodka tonics

With the heat still pretty high, pour in the chicken broth. Scrape up the brown bits with a whisk and let it come up to a boil. Add the butter and stir until it's melted. Then dump in the Dijon and whisk to incorporate. Put in about 1 T of capers, or more if you like them, and stir around. Pour in about 3/4 to 1 c of the half and half. Bring back up to a boil and let it go for 2 or 3 minutes, until it starts to thicken up. Add a pretty big handful of Parmesan and stir until it melts and combines. Add a squirt or two of lemon juice and stir.

Put the pork chops back into the skillet, with the juices from the plate, reduce the heat and let them enjoy the cheesy, creamy loveliness of the sauce for about 5 to 7 more minutes, (or until they are done – depends on the thickness of the chops) turning to coat.

That's it! It was ready and on the table with a salad in about 20 minutes. And it was delish! This same exact technique and sauce would work for thinly pounded chicken breasts, too.

This meal reminded me of how great it is to be able to whip something up from staple items on hand in the fridge or the pantry. So here are a few things from this meal, as well as some other ideas, that I intend to keep around for these occasions.

• Half and half - what sauce doesn't benefit from it? A small container keeps for quite a while.
• Chicken broth – if I am down to three cans, it's an emergency. I get mine in cases of 12 from Sam's Club.
• Capers – this one may come as a surprise, but nothing "classes up" a simple sauce like a tablespoon or so of these little, salty treasures.
• Dijon – grainy, smooth, whatever, it all works.
• Parmesan – it's great for toppings, breading and sauces. I even put it in my meat loaf. The tub of pre-shredded Parm is just fine.
• Lemon – this one is harder for me to remember to keep on hand, but it added a wonderful brightness to the sauce, even with just a tablespoon or so. I never, ever use that container of plastic lemon juice – it tastes plastic, too. Better to just leave it out.
• White wine – I didn't use any in the sauce this time, but it is a nice addition. I usually have some Chardonnay around for drinking, and throw it in my sauces from time to time. You could use about 1/2 chicken broth and 1/2 white wine for a little different flavor.
• Sour cream – if I had been out of half and half, I probably would have replaced it with sour cream. To me, it's a good substitute because it adds a creamy consistency. It adds a little tartness to the sauce, giving it a slightly different flavor.

Using this technique, you can whip up a sauce that will taste like it took you much longer than 10 minutes to pull together. And with a few items always at the ready, you'll feel like a celebrity chef!

February 13, 2007

My dinner with t-bone

When The Bob goes out of town and I'm on my own, I try to plan a nice dinner for one (and of course a "cry movie") so that I feel I'm spoiling myself. That situation presented itself recently, and I was in the mood for a Big Steak, spinach souffle and a nice glass of red wine. I encourage you to try this. Cooking for one is no big deal, seriously. You don't have to settle for a TV dinner or a depressing bag of microwave popcorn.

I decided to center my meal around a Big T-Bone. My steak was 1.4 lbs and about 1.5 inches thick! According to the Meatman, the t-bone has a smaller piece of tenderloin than the porterhouse. The cuts from the short loin, including the t-bone, porterhouse, club steak and tenderloin really should not be cooked for long periods of time, but are best either grilled or pan fried, and can also be broiled or sautéed. The trick is to have the heat pretty high, sealing in the delicious juices. I have a great cast iron grill pan, which is almost seasoned to perfection (a few more steaks on it and it will be ideal), so that was my pan of choice.

I have learned this technique from a lot of cookbook reading, as well as watching Food Network, but my mother was actually the first person who told me about it. (See my previous article on this subject here. )

Here is my step-by-step on the biggest t-bone of my life!

1. Drizzle a little olive oil over both sides of your steak and massage it in. Season it on both sides with some grill seasoning and salt and pepper. I used a premade mesquite seasoning, but use whatever you like, or none at all, salt and pepper alone would be fine. Leave the steak out of the fridge, but covered, to take the chill off it. Open your bottle of red wine (I had a decent Zinfandel), and YOU chill for about 15 or 20 minutes. The steak will be delicious.

2. Heat the grill pan over pretty high heat. When you hold your hand over the bottom of the pan for a couple of seconds it should feel HOT. Take another sip of wine and go to the next step.

3. Throw the steak into the pan unceremoniously. Then leave it alone. Watch the previews on your DVD rental, but whatever you do, do not touch this steak.

4. When you see some moisture (blood) coming up on the uncooked side, it should be ready to turn. You should have no trouble with the steak sticking at all; if it resists you, let it go another couple of minutes. Flip the steak and leave it alone. (Check out the sweet grill marks I got on this Big Steak!)

5a. Lower the heat just a tad, to medium. Don't move the steak around, it is fine. When you see some moisture coming to the top of the steak, it should be about medium rare. Leave it just a little longer for medium.

5b. This is optional, but not if you're from my family. Put a pat of butter (not margerine, butter) on the steak toward the end of the cooking time. There's something absolutely decadent about the flavor of the steak with a bit of butter.

6. Refill the wine glass and serve.

This steak was so huge that I got two meals out of it (I made fajitas with the leftovers). And, it did feel like I was totally pampering myself.

A meal for one can be fun and satisfying. Hopefully your movie will be as good!

February 01, 2007

Neat trick for organizing your spices


I know may people find it convenient to have their spices out near the stove for easy access, but for me, it becomes a clutter issue. I have never been a fan of spice racks because, call me lazy, I don't want to take the time to decant them into pretty little jars. Putting them willy nilly on a cabinet shelf is a problem because then I waste time rooting around to find the cumin. So, ideally, I would store all the spices in a cabinet close to the counter and stove, and access them very easily.

But I'm cheap – I want an organization method that is very inexpensive if not free. And I found just the thing. Empty silverware drawer organizers. These were leftover from a previous house, but for some reason I kept them and I am so glad I did. Because they're going into a cabinet, they don't really need to be pretty, although I am sure if you wanted to invest some money you could find wooden or colorful plastic organizers that would work. These happen to have nice, straight sections, which is necessary to accommodate all the shapes and sizes of spice containers.


I organized them by type and use – one organizer is for pure spices, the other is for all our spice blends and mixes. Find the method that works best for you. When we need the spices, the organizers quickly pull out, you can see what you need quickly, and they stow right back away.


It's a neat trick that keeps your spices under control and your cabinets manageable.

January 11, 2007

Shoes, Glorious Shoes!


I love shoes. Some people might call it an obsession. Heels, flats, boots, thongs, mary janes, tennis shoes, hiking boots, ballerinas, mules, pumps, my awesome Chuck Taylor® Converse All Stars – you name them, I love them. I have quite a selection.

But here's the thing:

I keep all my shoes in their original boxes.

Despite the ribbing I have taken about this over the years, I consider this one of my best time-, space- and money-saving tips.

• It saves time. Years ago, like a lot of people, I threw my shoes on the floor of my closet, and lost precious time every morning trying to locate two shoes that matched.
• It saves space. Boxes stack easily on a closet shelf or the floor if need be. You can also stack by style, color and season.
• It saves money. That may seem like a stretch, but think about it. Taking care of your shoes keeps them newer looking longer. They keep from getting scuffed because they are safe in their boxes. Stuffing the toes with tissue helps absorb any oils that can eventually cause the insoles to deteriorate.

If for some reason a box breaks down and I'm forced to throw it away, I replace it with a clear plastic shoe box with a lid. Although I usually remember what shoes came in what box, I try to stack the boxes with the label side out, which frequently has an illustration of the shoes, so that makes it easy for me to scan for the pair I want. I personally like the box system better than hanging shoe bags. I have tried them and find that they take up too much hanging space in my closet, and my shoes tended to get scuffed or squashed too easily.

I have a passion for my shoes, and I want to keep them looking good as long as I can. I encourage you to try this and see if it doesn't help you save time, space and money in the long run!

December 28, 2006

Five reasons why it is okay to have routines

I have been called rigid and inflexible. I have been told I am not spontaneous. I often ask about the "plan" and am not always comfortable if there isn't one. I like to have a routine. And there's nothing wrong with that.

The results of a 50-year study published by the American Psychological Association's (APA) Journal of Family Psychology show that routines are important to the health and well-being of busy families.

"Routines involve instrumental communication conveying information that 'this is what needs to be done' and involve a momentary time commitment so that once the act is completed, there is little, if any, afterthought," says Dr. Fiese. I couldn't have said it better myself! Routines can include dinnertime, bedtime, chores and all the other nitty-gritty aspects of running a home.

For me, routines...
1. ...keep me from forgetting things. It's early, I'm sleepy and it's time to get ready for work. If I didn't have a morning routine, I would probably forget my deodorant on a regular basis.
2. ...make me more efficient. There are steps involved in each routine, which I have developed to get the job done quicker. That means I can move on to the next thing faster than if I approached the job haphazardly.
3. ...help me stay organized. The Bob may tease me about everything having a certain "home," but this is part of the routine. If my socks are all lined up by color, I don't waste 5 minutes a day looking for a pair that match.
4. ...make me feel competent. Working 40+ hours a week and trying to run a home isn't always easy. Routines at home help me feel like I'm doing as good a job with the "home ec" as I am with my paying gig.
5. ...are comforting. There is a certain comfort in routines. For example, I know that almost every day we are going to sit down to dinner together, spend time talking about our day, clean up the dinner dishes together and then settle down for the evening. It feels like nothing is spinning out of control, and that's a good thing.

Here's my disclaimer. Routines are just constructs, providing structure to our activities of daily living. If they start to take the place of people, they may have become obessions and it's probably time to rethink them.

My routines are important to me despite the occasional teasing I get. If you haven't developed your own routines, start with something simple – like your morning routine. Try thinking through the things that need done and do those things in the same way every day for a week. I think you'll find that you get a lot of satisfaction, and chances are, you won't forget your deodorant!

December 06, 2006

It's beginning to look (and smell) a lot like Christmas

Here's a cute decoration I accidentally came up with a couple of years ago that I just love. After decorating the tree, I had a strand of plain white lights left over, so I plopped them into a big Longaberger basket I have, just to get them out of my way. For some reason I looked at it and thought to plug it in. The way the light came through the weave of the basket looked really pretty, I thought, but looking into the basket and seeing the lights wasn't so pretty. So, I grabbed a bag of cinnamon-scented pine cones I had picked up at Michael's and threw them in on top of the lights to disguise them. Plugged the whole thing back in and a few minutes later the cinnamon scent was all through the house. The lights put off just enough heat to warm the pine cones, releasing the fragrance. (I always unplug them when we're not home, just to be safe.)

This year in addition to the pine cones, I wove strands of red and natural wooden bead garland through, draping them here and there over the rim of the basket. Then I stuck in these apples and pears to add more interest. The end result is so cute, very homey, and of course smells delish.

Any basket with a somewhat-loose weave would give the same result. I also think you could use any fragranced pine cones or pot pourri – evergreen would be wonderful. If you're not into a rustic look, try spray painting a basket gold or silver, and put shiny colored Christmas ornaments on top of the lights. Then you could weave in some satin ribbon and silver or gold bead garland. If you want the fragrance, you could try some esential oils on a cloth or cotton balls, which would be hidden by the other decorations.

The Bob and I love the way the house looks, feels and smells at Christmas. Try this decoration and let me know how it works for you!

UPDATE 12/29 – Since The Bob gave me a neat-o digital camera for Christmas, I thought I'd update this post with an actual shot of my basket decoration. I hope you try this next year!

December 01, 2006

Ten very unscientific ways to deal with holiday stress

I posted this over at my other site, Shopping Tips Online, but I thought it would fit in well here, too.

I am not a psychologist or a doctor of any kind. I'm not a guru, yogi or guide. If you want advice about beating holiday stress from any of those types, there are articles out the snow globe all over the Internet. Have at them. Here are three I found in a matter of seconds. Take the stress out of holiday shopping. Tips offered for holiday shopping stress. 10 tips for stress-free online holiday shopping. There you go.

That being said, I have 10 very unscientific ways to deal with holiday stress. (The standard disclaimers apply.)

1. Shorten the gift list. This is not a joke. This year, buy only for the people closest to you. Give cards and a hug to the rest. You will feel like a thousand pound weight has been lifted. Don't feel guilty.

2. Admit you're human. There are only so many days, and only so many hours. If you’re not ready to admit that, check out the dark circles under your eyes and the vein popping out on your forehead. It will be okay.

3. Play A Charlie Brown Christmas – The Vince Guaraldi Trio every chance you get. It's like a sedative.
charliebrownchristmas.jpg
4. Have an eggnog, hot buttered rum, hot cocoa with peppermint schnapps, or the holiday drink of your choice. A little glow from the drink and a glow from the Christmas lights and all will be right with the world. (Drink in moderation.)

5. Avoid the situations you know will make you mad.
I can't drive into the parking lot at the mall after Thanksgiving without feeling like I have a severe case of Tourette's syndrome. So I don't do it. There is always somewhere else I can go to get what I need. Saving a buck isn't worth feeling like the top of my head is going to come off.

November 28, 2006

How to start a holiday tradition – the hard way


The first Christmas The Bob and I were together, we bought a big, beautiful Christmas tree to decorate. We were so excited – egg nog, Christmas carols on the CD player, the whole nine yards. We got the tree home, stuck it in the tree stand and it jutted out at about a 45º angle. The Bob said not to worry, and he took it out in the garage to start cutting off the crooked part. By the time he cut the trunk so that it would be straight in the stand, our 8' tree was down to 4'. What could we do? At first we were upset – our holiday tree decorating was ruined! But then we just started laughing.

The Bob went and got another tree, but we couldn't bring ourselves to get rid of the "first tree" we ever bought together. So, we turned that dinky sawed off tree into our first Chrismtas tradition – the Kitchen Tree. I had a corner I tucked the tree into and decorated it with a ton of oversized fruit ornaments and my mom's old Christmas cookie cutters, similar to the ones shown here. In keeping with the theme, I used a vintage printed tablecloth as a tree skirt.

Since then, we always have a Kitchen Tree. We took what could have been a really rotten situation, and made something cute out of it. What are your holiday traditions? How did they get started? Creating memories is one of the things the holiday season is all about.

November 25, 2006

Give your gift wrapping a signature touch

Half the fun of getting a gift is the unwrapping. A carefully wrapped gift creates exitement and anticipation, and shows that the giver cares. Every year I come up with my own signature gift wrapping, but you know if you have spent any time at Home Ec. for Grownups that my method is designed to be a time saver, as well as budget conscious.

Here are some ideas for you to try that have all been successful for me, not to mention very cute!


"Special Delivery"

You'll need:
• Brown kraft paper, found on rolls at your office supply store
• Manila hang tags, also from the office supply store
• Colored markers – I use red and green for a bit of color
• Cotton twine

Wrap the box in the kraft paper as usual, then tie the twine bundle-style around the package. Use the manila hang tag as the gift tag. As a variation on this theme, I have used a stamp pad and holiday stamps to decorate the top of the package, as well as the hang tag.


"Simply Wonderful"

• White rolled kraft paper
• Red grosgrain ribbon – use whatever width you like; I use something like 1/2" or 3/4"
• Mini ornament – I find these in packages of 8 or 10 in stores such as Big Lots

Wrap your boxes in the white paper and tie with the grosgrain ribbon. Be as generous as you can with the ribbon. I never mastered the art of tying a big, fancy bow, but I think a simple bow looks best anyway. Tie a mini ornament in the center of the bow – preferably one that reflects the receipient's tastes or interests.

You can vary the ribbon color on this style. I have used cream on white for a simpler tone-on-tone look, striped green/white gives a more woodsy effect. I think a white, round grommeted tag would be a nice touch on this, but experiment and see what you like. The thing to remember is that each package uses the same white base, saving you time and money.

The beauty of either of these ideas is that when your gifts are all wrapped and under the tree, they become part of the decor. My style tends to be more "country cottage" or "cabin in the woods," but your style tends toward more formal or "glitzy" think about all your gifts in the same metallic paper, with satin ribbon.

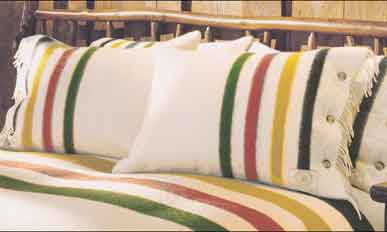
I have not decided what my look will be for '07, but I am thinking about a Trapper's Blanket effect using cream or white paper and ribbon "stripes" in black, red, yellow and green.


Try something with your own signature touch this year, and get ready for the compliments you will get, not just for the gift, but for the wrapping!

November 20, 2006

Here's a cool tip for painting projects around the house.


I really love painting projects – it's a fast, inexpensive way to change a room or change the look of a piece of furniture. I am currently painting my old kitchen cabinets, and I am really happy with the results. But, I do NOT love the cleanup, so I try to streamline it.

Here's a simple tip to remember when you're painting and your project will take more than a day to complete. If you're going to be using the same acrylic latex color (not oil based), wrap your roller or brush in plastic wrap and put it in the refrigerator overnight. I use a small zip-top bag for my smaller brushes, squeezing out the air when sealing. The paint stays moist, and you're ready to go the next day. If it's a project you're not going to get to the very next day, put the wrapped roller or brush in the freezer. You will just need to allow a little time for it to thaw when you're ready to pick your project up again.

I know this sounds a little crazy, but I have done it a million times, always with great results. So, stay "cool" the next time you're painting and you won't sweat the cleanup!

November 16, 2006

Holiday Decorating with Candy

This is a holiday decoration that I came up with a few years back, mostly out of necessity – we didn't have a lot of money to spend on decorations, so I needed lots of bang for my buck. I used this idea a couple of years in a row, first on our mantle, then in the kitchen, and it never failed to get compliments.


Here's all you need:
• Peppermint candy
• Candy canes
• Peppermint sticks
• Clear glass containers – glasses, vases, hurricanes, whatever you have in the house will work with this idea
• Red satin or grosgrain ribbon, optional

Get enough candy to completely fill several containers. (Hint: Keep them in their wrappers and you can reuse year after year.)

Then just have fun. Hook candy canes around tall, cylinders or clear glass tumblers. Stand peppermint sticks in shorter, rocks glasses and tie with ribbon. Fill a brandy snifter or a martini glass with peppermint candies and tie the stem with a ribbon. Fill the bottom of a vase with peppermint candies and stand peppermint sticks or candy canes to resemble a bouquet in "water."

Then arrange the filled containers all together, varying the height. I suggest placing them in among some greenery or garland for the added color and pop. Little white lights look gorgeous with this, too.

This idea would make a fantastic centerpice for a holiday buffet table (I may do this myself this year!).

November 14, 2006

How to wear a cheap shirt and get away with it.

This blouse is on sale on the Wal-Mart site for 7 bucks. That's less than two double shot lattes! I picked up two of them in white, so I always have one clean and ready to go. It's a cotton/poly blend, so it washes up great and only needs the lightest touchup with an iron, if that. I intentionally chose white because it goes with everything, and can be dressed up or down. Matter of fact, I'm wearing it today with a tweed suit jacket,a black pencil skirt and high boots. Saturday I wore it with my jeans, penny loafers and gray cardigan.

How can I wear a blouse this cheap and not feel self-conscious? Here's how to get away with it.

1. Layer it. The white collar and cuffs give the look I am going for under a jacket, a sweater or a vest.
2. Don't dress discount head-to-toe. I know many of the new lines at discount stores like Wal-Mart are much better than they used to be, but my general rule is to mix some of my better-quality items with the lower quality.
3. Don't tell anyone what you paid for it! Just wear it with pride, knowing you look very polished and put together!
4. When it starts looking shabby – toss it. When this white blouse starts to look dingy gray, or when/if the fabric pills, I will throw it out. If I happen to get a stain, I'll salvage it if I can by continuing to wear it under other garments. But, when it's time is up, it's gone. It was SEVEN bucks, comeon.

Enjoy the price, wear with pride!

October 27, 2006

Quick, easy, cheap and CUTE Halloween pumpkin idea


If I had time (and patience), I would definitely carve pumpkins to rival Martha Stewart. Unfortnately, I don't have a staff to help me with that, so I am on my own when it comes to holiday decorating.

Bob brought home several pumpkins to decorate our porch this year, and I did a cute fall arrangement of them with a straw bale and some fall foliage. But I wanted to do something a little special with them just for Halloween. My idea is to keep them whole, so hopefully they will last a bit into November.


So, here's the TRICK. I gave my pumpkins "costumes!" Believe me this is so cute, and fast, and cheap! And your neighbors will RUN to the store to copy you next year.

I lined up three pumpkins – two short guys on either side, and a tall "girl" in the center. On each one I put a black plastic mask, which I found at the craft store for about $1 a piece. The elastic holds the masks in place. Then on the center one, I found a black, foam witch's hat that I put on and secured in place with a couple of long nails (T-pins would work as well). The foam makes it weatherproof, too, which is a bonus!

They have adorable "personalities" now!

I'm telling you, try this. You will get lots of comments on your "trick or treaters." This would also work well for a centerpiece for your holiday party. It takes about 2 minutes and less than five bucks. That's a trick and a TREAT!

October 26, 2006

Botox for your clothes – Magic Sizing


I tried embracing the intentionally-wrinkled look. You know the one I'm talking about – shirts that look like they've been slept in. No. Not for me. I wanted botox for those shirts.

So, I iron. I actually enjoy ironing, (when I'm not running late, then not so much). There's something therapeutic about it. And the end result feels so Martha.

I recently rediscovered a really old-school product that helps me get that fresh, crisp look I am going for. Magic Sizing. I use the light body formula, so it's not at all stiff, but it helps get out the big wrinkles and smooths away the tiny surface wrinkles, too.

Check out their site, which was recently updated. While you're there, download their PDF on "How to Iron." It's a one-pager on how to iron a shirt (yes, believe it or not, there really are steps to ironing a shirt).

Give your shirts the professional treatment. Botox for clothes – Magic Sizing.