November 14, 2006

How to wear a cheap shirt and get away with it.

This blouse is on sale on the Wal-Mart site for 7 bucks. That's less than two double shot lattes! I picked up two of them in white, so I always have one clean and ready to go. It's a cotton/poly blend, so it washes up great and only needs the lightest touchup with an iron, if that. I intentionally chose white because it goes with everything, and can be dressed up or down. Matter of fact, I'm wearing it today with a tweed suit jacket,a black pencil skirt and high boots. Saturday I wore it with my jeans, penny loafers and gray cardigan.

How can I wear a blouse this cheap and not feel self-conscious? Here's how to get away with it.

1. Layer it. The white collar and cuffs give the look I am going for under a jacket, a sweater or a vest.
2. Don't dress discount head-to-toe. I know many of the new lines at discount stores like Wal-Mart are much better than they used to be, but my general rule is to mix some of my better-quality items with the lower quality.
3. Don't tell anyone what you paid for it! Just wear it with pride, knowing you look very polished and put together!
4. When it starts looking shabby – toss it. When this white blouse starts to look dingy gray, or when/if the fabric pills, I will throw it out. If I happen to get a stain, I'll salvage it if I can by continuing to wear it under other garments. But, when it's time is up, it's gone. It was SEVEN bucks, comeon.

Enjoy the price, wear with pride!

November 08, 2006

Cinnamon Flavored Coffee – Hold the Barista


I have always been a coffee purist, but The Bob recently convinced me to step a foot outside my comfort zone and try the flavored kind. I do not care for coffee flavored with syrups – for me they taste thickly-sweet and leave a bad aftertaste. So I tried several varieties of coffee with the flavor roasted in, and found a few I enjoyed. Hazelnut was surprisingly NOT one of my favorites. Like cilantro, some people just don't like it; to me it tastes like soap. Cinnamon-versions were a favorite of mine, but as you know, one of my recent money saving initiatives was to take my coffee from home (Cup of Joe for a Lot Less Dough).

So, I started experimenting, and came up with a super-easy tip for making cinnamon coffee at home. The delicious aroma of cinnamon will be in every sip.
This is so simple it's hardly a "recipe." But, here goes.

Fill your coffee maker with water, and prepare the grounds your usual way. Sprinkle the grounds with cinnamon. Brew.

This works with either freshly ground beans or already-ground coffee. I just use a French Roast or some other medium bodied blend.

The amount you use depends on how much of a cinnamon aroma you want. Be careful, though. You can go overboard with cinnamon and it may end up bitter. So, experiment with about 1/4 to 1/2 teaspoon for a full pot. Then adjust up or down from there.

Cinnamon coffee from home. No barista needed.

November 07, 2006

NEW! Creamy, cheesy, chicken rollups


The original was pretty good, but I think this little modification made a difference, and will become my new standard. Bob and I both loved it. Basically, I replaced the flavored Philly from the original recipe with Alouette Spreadable Cheese in their Sundried Tomato and Basil flavor. I swapped a thin slice of deli ham for the prociutto. Also, instead of browning before putting the rollups in the oven, I just put them directly into a 350º oven for about 45 minutes, and they were extra tender and juicy. They weren't as brown as the original recipe, but I sprinkled the tops with salt, pepper and some poultry seasoning, which did give them some color.

So, here's the new, improved "creamy, cheesy chicken rollups" recipe!

4 boneless, skinless chicken breasts, butterflied and pounded thin
2 T or so Alouette Spreadable Cheese – I think any flavor would work, but I recommend the sundried tomato!
4 slices deli ham
Salt, pepper & poultry seasoning

Preheat oven to 350º. Spray a 9x12 Pyrex® dish with non-stick spray. Spread a layer of cheese on each chicken breast, then top with a slice of ham. Roll, jellyroll style, and place seam side down in baking dish. Salt, pepper & poultry season to taste. Bake, uncovered, for about 45 minutes. Check for doneness. The cheese & the juices from the chicken make a nice sauce right in the pan.

They take a little prep up front, but the result is worth it. They also look pretty enough for company. So, give these a whirl and let me know how they work for you!

November 06, 2006

Mini-Review – Monster House (2006)


Monster House (2006)

Synopsis: For sale by owner – 3BR, 2BA, two-story fixer-upper; appliances and monster stay.

Finally, an animated film that's an adventure with a bit of an edge. Three teens have a run-in with the cranky neighbor and his, well, very bad house. The three main characters are likable, realistic (for being animated) and they make an interesting, offbeat team. I recommend it. It's a little spooky, a little funny, a little dramatic and quite a bit edgier than other kids movies I have seen.

Note: I thought some of the scenes might be too upsetting for little kids, so you will have to be the judge.

November 03, 2006

My FIRST Holiday Decorating Purchase – Handhooked Rug from L.L.Bean®


Check out my first (of many) holiday decorating purchase. The Vacationland Hooked Rug from the Holiday Gift Shop at L.L.Bean. I first spotted these in the catalog I received in the mail, but went to the website and found they had many more designs to choose from.

These are absolutely adorable, with a very cool, nostalgic vibe. They're very thick and rich in feel, and look like they cost a lot more than their retail price of $19.50. I am very tempted to order another one (or two!) for the house for this Christmas. I chose "Mountainside," which looks great with our "cabin in the woods" holiday decor.

L.L.Bean comes through for me every time! Go check out their other deals in the Holiday Gift Shop!

October 30, 2006

Easy and cute crocheted scarf – the perfect Fall craft project


In the Fall, I usually get bitten by the craft bug. I wander craft stores looking for that ONE craft that will bring me nearly instant gratification, and this year, it’s crochet. It’s been years since I picked up a hook, but I decided to do a simple project to refresh my memory, and possibly give me something cute to wear. I have been noticing cute crocheted scarves here and there, and online, so when I ran across a free pattern flyer for this Classic Wool - One-Skein Scarf I grabbed it. I made mine in a rich brown, and had a lot of fun making it. I worked on it for about an hour one evening while watching television, and finished it up in a couple of hours on a Saturday while doing laundry. It’s done in all double crochet stitches, so it’s simple. You can go here to learn learn to crochet. The site has good illustrations of stitches. Now that I have one project under my belt, I’m going for another – this time a simple cloche hat in a brown wool tweed. Looking for a quick, easy and fun project for this fall? Try something crocheted!

October 27, 2006

Quick, easy, cheap and CUTE Halloween pumpkin idea


If I had time (and patience), I would definitely carve pumpkins to rival Martha Stewart. Unfortnately, I don't have a staff to help me with that, so I am on my own when it comes to holiday decorating.

Bob brought home several pumpkins to decorate our porch this year, and I did a cute fall arrangement of them with a straw bale and some fall foliage. But I wanted to do something a little special with them just for Halloween. My idea is to keep them whole, so hopefully they will last a bit into November.


So, here's the TRICK. I gave my pumpkins "costumes!" Believe me this is so cute, and fast, and cheap! And your neighbors will RUN to the store to copy you next year.

I lined up three pumpkins – two short guys on either side, and a tall "girl" in the center. On each one I put a black plastic mask, which I found at the craft store for about $1 a piece. The elastic holds the masks in place. Then on the center one, I found a black, foam witch's hat that I put on and secured in place with a couple of long nails (T-pins would work as well). The foam makes it weatherproof, too, which is a bonus!

They have adorable "personalities" now!

I'm telling you, try this. You will get lots of comments on your "trick or treaters." This would also work well for a centerpiece for your holiday party. It takes about 2 minutes and less than five bucks. That's a trick and a TREAT!

October 26, 2006

Botox for your clothes – Magic Sizing


I tried embracing the intentionally-wrinkled look. You know the one I'm talking about – shirts that look like they've been slept in. No. Not for me. I wanted botox for those shirts.

So, I iron. I actually enjoy ironing, (when I'm not running late, then not so much). There's something therapeutic about it. And the end result feels so Martha.

I recently rediscovered a really old-school product that helps me get that fresh, crisp look I am going for. Magic Sizing. I use the light body formula, so it's not at all stiff, but it helps get out the big wrinkles and smooths away the tiny surface wrinkles, too.

Check out their site, which was recently updated. While you're there, download their PDF on "How to Iron." It's a one-pager on how to iron a shirt (yes, believe it or not, there really are steps to ironing a shirt).

Give your shirts the professional treatment. Botox for clothes – Magic Sizing.

October 20, 2006

Who plays you in the movie of your life? Find out here

If you haven't seen this yet, it's an Internet phenomenon. It's called Face Recognition on MyHeritage and it's pretty amazing. Using some very advanced technology, faces in photos are scanned and matched to faces in a database. It is used for geneology research to identify family members, or even find relatives years later through face recognition.

For me, it was just downright fun. They have a free demo that compares your photo to their database of celebrity photos, and calculates the percentage match. I did both Bob's picture and mine, and here's how we did.

Bob was matched to:
Joey Fatone (N'Sync) (66%)
Alec Baldwin (63%)
Travis Tritt (61%)
Adam Sandler (56%)
Brad Delson (Linkin Park)(55%)
Tom Green (51%)
Barry Williams (Partridge Family)(51%)
David Hasselhoff (51%)

I (can't believe I) was matched to:
Reese Whitherspoon (78%)
Jane Curtain (75%)
Kate Hudson (74%)
Adrianne Curry (74%)
Eva Longoria (74%)
Debra Messing (73%)
Audrey Tautou (73%)
Diana Ross (73%)
Nia Long (72%)
Amanda Holden (72%)

Go, upload away and have some fun!

October 19, 2006

Pick a pair of pork chops


Growing up, I was the salad and side dish kid. Subsequently I can make a killer Waldorf, but I struggle with the main course, particularly if it's meat. I could spot a boneless, skinless chicken breast, but when it came to various cuts of pork or beef I couldn't tell which chop or steak was which.

I found a nice handy pork chop identification chart that actually shows each kind of pork chop, describes what they are used for and generally what to expect in terms of tenderness. What is shown here is a boneless loin chop – these are what I threw in the oven last night. I covered them in mesquite marinade and baked them at 350º for about 45 minutes and they were tender and juicy.

Now I am the salad and side dish queen – and someday I will be an expert on cuts of meat, too. Check out the chart and let me know what you think!

October 16, 2006

Hair color and shine booster, without all the trauma


I am hair handicapped. I have always struggled with hair styling products and appliances. Coloring my hair at home is entirely too traumatic for me and I would never attempt to add highlights on my own (think Bride of Frankenstein). So, I'm always on the lookout for products that are easy to use and give me a little confidence boost.

John Frieda® - Luminous Color Glaze™ may be the perfect product for someone like me. While you're still in the shower, you put it on your hair like conditioner, distributing it from roots to ends. Leave it on for three minutes, then rinse. That's it. No mixing. No gloves. No haz mat suit.

This isn't like a major transformation (which is perfect for me), it's just supposed to give your own color a little boost. The company claims that the color will build up over time, and they recommend using it at least three times a week. I have used it for two days now and my hair feels very silky and shiny and I notice today that my color is just a little richer somehow. It's a hair product with no trauma.

Let me know if you try it and how it works for you!

October 11, 2006

Easy one-skillet meal – Reuben Bake


This was easy. Ridiculously easy. Perfect for a dismal, drizzly Tuesday night. I'm calling it a Reuben Bake, but it starts life in an oven proof skillet.

1 lb. package fully-cooked smoked sausage, sliced into 1/4" disks (I used Beef)
1 15 oz. can sauerkraut, drained and squeezed
1 cup (or so) thousand island dressing
8 slices Swiss cheese
1/2 t. (or so) carraway seeds (opt.)
1/2 t. (or so) paprika (opt.)

Here's all you do.

Heat your oven to 350º. In an oven proof skillet drizzled with some olive oil, brown the smoked sausage over medium heat, then pour off any excess grease. Spread the sausage evenly in the pan. Layer in the sauerkraut, the spices, the dressing and the cheese. Pop into the oven for about 1/2 an hour until it's bubbly and the cheese is lightly browned.

I toasted some dark rye bread for Bob and spooned the Reuben bake over, making open-faced sandwiches. I had it right out of the pan with a small salad. Easy to make, easy to clean up.

Ridiculously easy Reuben Bake.

October 09, 2006

Mini-Review – X-Men: The Last Stand

X-Men: The Last Stand (2006)

Synopsis: Finally. The cure for the common mutant.

It's very hard for me to be critical of comic book superhero movies (okay, except for Fantastic Four, that was easy). So realize that while I found a lot in the latest installment of the X-Men to like, it pains me to say that there was also a lot I didn't like. Likes: the special effects are impressive, Jean is back (and man, is she pissed) and Wolverine is still crush-worthy. Dislikes: characters with no discernable super powers, characters with useless super powers, super powers that suddenly don't seem very super (come on, if you can FLY, why do you have to move the bridge?), too many new characters to care about and favorite characters that disappear or die for no apparent reason. I guess all that makes me sound like a stickler, but I do appreciate a movie with a good plot, and that was what was missing for me in this film. I recommend it for its main attribute: mindless fun. Some younger kids might find the Jean Grey scenes scary (I did!), so keep in mind the PG-13 rating.

October 06, 2006

The most important thing I learned from my high school job at McDonald's

Like a lot of people, my first job was working at McDonald's in the small town I grew up in. One thing I learned was humility – because we were required to wear horrible, greasy, polyester uniforms. All these years later I am almost over it.

I did learn one thing that has stuck with me and truly makes a difference in my life. Clean as you go.

In the kitchen. I simply will not start dinner if there are dishes in the sink. Letting the dishes pile up until after dinner just means that I'll still be washing dishes halfway through "Survivor." Taking the few minutes to wash those things up gives me a clean slate to start with. I also run a sink full of soapy water, drop things in as I work and, depending on the cooking time, wash them up while dinner's in the oven. Clean as you go, and you will be out of the kitchen and on the couch much sooner.
In the bedroom. I don't leave for work until the bed is made. If that brings back bad memories of your parents' rules, I apologize. Truth is, they were right. Making the bed only takes a couple of minutes. Then it's done. It makes the room look and feel cleaner. It also makes the room feel calmer. Clean sight lines are important after a long day at work. You will be surprised.
In the living room. One quick pass through a day is all that's needed to tidy up, corral magazines and toss newspapers. I suggest keeping a small trash can in the room – the fewer reasons you have to avoid straightening up the better. Remember: letting the clutter pile up makes for a much bigger chore later on.
In the bathroom. I keep a container of disinfecting wipes right on the counter day to day, and stow them below when company's coming. Keeping them on the counter makes it easy for me to swipe down the counter and sink while I'm brushing my teeth. It smells fresh, too, making the whole bathroom seem cleaner.

My parents told me getting a job at 16 would pay off someday. They may have meant something different, but they were right in one way. I learned – Clean as you go!

October 04, 2006

Mini-Review – Friday Night Lights

NBC.com - Friday Night Lights

Synopsis: Football isn't the most important thing. Oh wait. Yeah, it is.

Right off the bat I have to tell you that I cried, not once but twice, during the hour-long season premiere. It's a little embarrassing because this show wasn't particularly original. You take a small Texas town, add a brand new high school football coach, a shot of team infighting, shake with one golden-boy quarterback, garnish with who-will-sleep-with-the-head-cheerleader and you've got the makings for your typical football movie.

What got to me was that it had some darn good acting (for the most part), looked like a film rather than a TV series, and was a good story (even if it was familiar), complete with a tear-jerking plot twist and a Hollywood ending. I'm not sure how they will sustain that level throughout the season, but we're willing to watch and see. I will just keep the tissues closeby.

October 03, 2006

Crikies! I have been critiqued!

CRITIQUE MY BLOG!

Billy Mac, of "Critique My Blog" has posted what I consider to be a very nice review of Home Ec. for Grownups. He likens my content to a class he had in high school called "Bachelor Survival."

I make an effort to cover a wide variety of topics that appeal to men or women, so hopefully everyone finds something practical that they can try. That's what I am all about, gang!

Thanks so much for reading, and be sure to visit CRITIQUE MY BLOG!

The least sophisticated way to organize your monthly bills (that really works)


If you're looking for bill organization tips from a CPA, you're at the wrong site. But if you're looking for an easy, albeit unsophsticated, way to start getting your bills under control, take a look at this. I have been using this method for years now and it works. Many of my recurring bills I have withdrawn automatically, but this is for the bills I still want to pay "the old fashioned way."

1. Open your mail. This may seem silly, but I know how easy it is to let the mail pile up. If you just open it when you get it, it won't turn into a big chore later on.
2. Make three piles. A pile for bills, a pile for trash and a pile for "other" (magazines and whatnot). Be ruthless about the trash.
3. Open the bills. Here's my method. I open each bill, tear off the payment stub, check the balance/total due, tear up the rest and put it in my trash pile. Statements are always available from the company, and for me, keeping all that turns into a storage issue. (By the way, I tear up anything that has an account number on it, just in case. A shredder would work, too.)
4. Set them up. I buy preprinted return address labels that I slap on each envelope right then to save time later on. I write the date due on the envelope, in the upper right hand corner. Then, and this is the unsophsticated part, I take my "Bills Due" clothespin and pin them together, in the date order they are due, the most recent on top. That's right. I use an old, wooden clothespin with a hang tag marked "Bills Due". It goes on my desk in a basket and it's visible, but not a messy eyesore. You could use a big binder clip from the office supply store, or something prettier if you choose. I recommend something bigger than a paper clip, so that it doesn't get lost on your desk.
5. Check the clothespin. Once a week, pull the bills that are due, write out the checks, put in the pre-addressed envelopes, toss a stamp on and mail! That's it!

If you have struggled with keeping bills organized, this could be a place to start, and then you can advance to a more "twenty-first century" method. I'll stick with my clothespin method. It works for me precisely because it isn't sophsticated.

October 01, 2006

Chicken curry my way.

This is a takeoff on a chicken curry recipe I found on All Recipes. I swapped coconut milk for the water called for in the original recipe, and I added the cilantro. I think these changes improved the overall taste and texture of the dish. Bob said, “we can have this again” so I know it’s a winner.

Here’s what you’ll need:
3 boneless, skinless chicken breasts, cut into about 1” cubes
1 big onion, chopped
1 t ground cinnamon
1 bay leaf
2 cloves garlic, smashed
¼ t ground ginger
1 t paprika
3 T curry powder – I used a hot madras curry, but mild would work fine, too
½ t Splenda (or sugar)
Pinch of salt
1 T tomato paste
¼ c olive oil
1 can unsweetened coconut milk
½ t cayenne pepper (or more if you like it extra spicy)
The juice of ½ lemon
A handful of cilantro, roughly chopped

Here’s how you make it:
1. In a big, deep skillet with a lid, sauté the onion in the oil until browned. Add the cinnamon, bay leaf, ginger, paprika, curry powder, Splenda and salt. Cook the spices with the onion for a couple of minutes, stirring to combine well. The mixture will become like a paste.
2. Add the chicken and mix to coat each piece with the yummy spices. Add the tomato paste and stir. Pour the coconut milk over all and stir to combine. Cover the skillet and simmer for about 20 minutes.
3. Right before serving, squeeze in the lemon juice, cayenne and about ½ the cilantro and stir to combine. Garnish with the rest of the cilantro.

I served this with a simple boxed cous cous (with about a teaspoon of curry powder added) and pitas to mop up the delicious sauce. Plain rice would also work. It was great the next day, too. It’s impressive enough to serve for company, but quick enough to make on a weeknight. Try it!

September 28, 2006

Easy one skillet meal – Teriyaki pork chops


Bob loved this, and I loved the cleanup. Everything in one big skillet saves time and dishes!

You will need:
4 pork chops about 1/2” thick
1 green pepper, rough chopped
1 medium onion, rough chopped
4 pineapple rings (I used the kind with no added sugar)
Teriyaki marinade/sauce
1 package teriyaki rice (I used Knorr/Lipton brand, shown)
Red pepper flakes to taste
2 T olive oil
Soy sauce

1. Marinate the chops in teriyaki sauce for about 30 minutes. I used a plastic zip-top bag to save on cleanup. Just put enough marinade in to cover them, and turn the bag over and over to coat.
2. In a big, deep skillet, heat the olive oil until pretty hot. Place the chops in the oil, don’t crowd and don’t mess with them. When you see some juices come to the top, flip them. When you see the juices coming up on the second side, move them to a plate and loosely cover with foil.
3. In the same skillet, put the pepper, onion and red pepper flakes with a drizzle of teriyaki sauce and sauté until the veggies are just tender.
4. Add the water/oil per rice instructions into the skillet and add the contents of the rice package. Stir to make sure the rice is all coated. Bring to a boil.
5. Place the chops on top of the rice/veggie mixture. Top each chop with one pineapple ring. Put a little teriyaki sauce in the center of each pineapple ring. Cover and cook until the rice is tender (about 7 minutes according to package instructions).

Add soy sauce to taste. I served this with a simple salad topped with an Asian style dressing and crunchy chow mein noodles.

You could easily substitute chicken for the pork. This technique would work for any packaged rice side dish you can find at the grocery. Just change the marinade and veggies to match the flavor of the side dish you choose. Nothing to it!

A cup of joe for a lot less dough.


I have about a 20 minute commute to work in the morning. For a long time I stopped at our local drive-thru coffee shop and got a 20 oz. black coffee to go. Where I live, that cost me about $2 with tip. I was spending at least $40 a month on my morning coffee! Once the jitters wore off, I decided to find a way to reduce that cost – but going without my wakeup cup was not an option.

I tried making coffee at home and taking it in a travel mug. The drawback was, I would often forget to bring the mug home. On the days I did bring it home, I had to wash it, which made me miss the throwaway convenience of the coffee shop cups. No muss no fuss.

So I had an idea! I went to my local club store and purchased the exact same Dixie® 20 oz. cups and lids I got from the coffee shop – for an average of about 10¢ per cup. You can find the lids and cups at club stores or restaurant supply stores, or even online. So I save money and I have the convenience of a disposable cup.

I am not always the best at money saving, but this idea made very little impact for farily significant savings, without any complicated budgeting routine. And this way, I can justify that new top I need for this fall!

September 27, 2006

I'm through with mildew. Thanks to Lysol®.


No one likes to admit that they have a mildew problem. But, it happens. We live in a 100 year-old house with a small, enclosed bathroom and limited air circulation – the perfect the environment for mold and mildew to grow.

I have tried a lot of different products, but
Lysol® Mildew Remover with Bleach really works. I was honestly doing the touchdown dance in the bathroom because the telltale dark stain of the mildew disappeared before my eyes. The product has other benefits, too – it disinfects and removes soap scum, and has a very pleasant scent that is clean but not too antiseptic. Even when and if I live in a newer home, this is one product that is going with me.

To get rid of the mildew and stains I sprayed it liberally around the shower stall, waited about 10 minutes and then rinsed. To keep the mildew from coming back, and to prevent the buildup of soap scum, I am now routinely spraying around the shower about 2-3 times a week.

Try it under sinks, around toilets or wherever you may have a high-humidity or moisture problem and see how it works for you.

The Bestest Blog of the Day – Who me?


The Bestest Blog of All-Time

Hey, kids! I am very pleased and proud to have been named "Bestest Blog of the Day" for 9/27/06 on Bestestblog.com!

My goal with this site is not to just publish ideas from other sources, but to actually try things myself and write about what works. Some things I have been doing for years (like How to fold a fitted sheet) and some things I just invent (like my recipe for French Country Steaks), but my mission is always the same – I don't write about it unless I've tried it.

I hope you'll come back often, and be sure to visit Bestestblog.com!

Thanks so much!

September 20, 2006

The old school way to shop for vintage clothing.

If you have been looking at ideas for fall fashion lately, you know that a lot of the new styles have a vintage flair. Check out Style Bakery's Fall Trend Report and you'll see what I mean. This inspired me to check out some shops in my area to try to pick up some vintage items to add a unique, personal touch to my fall outfits.

I had a couple of things in mind when I went: men's vests and anything tweed. I scored two items. The first is a long, wool, sweater vest with leather buttons and a belt with a tortoise-shell buckle, which I will wear like a belted tunic over jeans or slacks. The second was a tweed pencil skirt with awesome twin kick pleats in the back. The skirt will look great with a black turtleneck and boots, or a classic white blouse, a sweater and a pair of Mary Janes.

Here are some tips when shopping for vintage pieces.
Study the trends. Check out magazines or sites like Style Bakery to get ideas, and make a mental note of what one or two items you could add that would give new life to your outfits. Then go shoppping.
Narrow your search. If you know you don't need another tooled leather purse, skip the purses.
Scan for high quality fabrics. If it looks and feels like high quality fabric, it may be. Check to see if there is an original label still inside the garment to confirm that. I think the best investments are wool or cashmere.
Check the size. Sizing has obviously changed drastically over the years, so don't rule it out if it's not your current size. Best to try on if the shop provides a dressing room.
Think versatility. The belted sweater vest I picked up can be worn with multiple outfits, with or without the belt, and can be layered with a lot of different blouses or sweaters.
Don't buy it if it's damaged. This may be just my rule, but if I take it home with the intention of repairing it, it will probably never happen.

For good quality vintage finds, expect to pay a little more. If you feel like scavenging, sometimes you can find nice pieces at a flea market, a resale shop or even a Goodwill store. Wherever you go, have fun and get ready for the compliments on your signature style this fall.

September 11, 2006

Silicone basting brush. I will never go back.


I am usually drawn to the old-world look of the old-school kitchen gadgets. Take the basting brush. I like the way the old wooden handles and natural bristles look. But, I have never been a fan of how hard they are to clean. The bristles retain a greasy feeling, and eventually, even with hand washing, a bit of rust develops around the metal part.

I happened to be in a Crate & Barrel store, and happened to have a gift card with me, so I picked up a few little gadgets, including this silicone basting brush. It was super inexpensive and came in cute colors, so I snagged a red one to try. I will never turn back. The material can withstand very high temps, and cleans up in super-hot water with lots of soap and never feel greasy. It actually holds quite a bit of sauce in it's "bristles" so it's ideal for mopping ribs or chicken on the grill. If you haven't made the leap to silicone, start here. For the price of a latté, you will have a handy little kitchen helper that does its job very well.

September 07, 2006

Creamy-cheesy chicken & prosciutto rollups.


Philadelphia® Cream Cheese

I always know it's a winner when Bob takes a bite and says, "We can have this again." That's exactly what he said after tasting a new recipe I made up, which I am calling creamy-cheesy chicken & prosciutto rollups. This is similar to a recipe I saw in a back issue of "Every Day with Rachael Ray." I didn't write the recipe down at all, just remembered a few basic ingredients and a technique, and then made the rest up. It was easy.

For the rollups:
Boneless, skinless chicken breasts
About 2T Philly soft chive and onion flavored cream cheese per chicken breast
1 thin slice of proscuitto per chicken breast
Salt, pepper & poultry seasoning
Olive oil for the pan

For the sauce:
About 1/2 cup white wine
2-3 T Dijon mustard (I used the grainy kind)

The method:
1. Pound the breasts as thin as you can without tearing them, about 1/4" thick. To make this easier, I put the chicken inside a heavy-duty gallon zip-close bag with one side slit open (it's heavier than plastic wrap). I also "butterflied" the breasts – cutting horizontally halfway through the thickest part of so that the meat is closer to the same thickness throughout.
2. Spread each flattened breast with about 2T cream cheese, depending on the size. Be generous with this. Then put a slice or so of proscuitto on top of the cream cheese.
3. Roll each breast up, tucking in the ends, sort of "burrito style." Take a couple of toothpicks and "sew" the seam up. Salt, pepper and poultry seasoning all sides of your rolls. They may not be the neatest looking, but don't sweat it! They will be delish!
4. Run some olive oil around an oven-proof skillet. Once the oil is pretty hot (medium high), place them in the pan (don't crowd). Brown on all sides. You'll know when it's time to turn them b/c they will "let go" of the pan.
5. Put the skillet in a 400º preheated oven for about 15-20 minutes, until the rolls are cooked through.
6. Take the skillet out and remove the rolls to a plate, loosely cover with foil. Deglaze the pan with the wine, scraping up the brown bits. Whisk in the mustard and reduce slightly. Put the rolls and their juice back into the pan, and simmer for just a few minutes, coating the rolls with the sauce.

These were tender, juicy and the flavored Philly® added a real rich and creamy texture. I may consider trying other varieties of the cream cheese, and might swap out the proscuitto for something like olives or ham. But I will be making these again!

August 31, 2006

Perfect pot roast in the perfect pot – my slow cooker.


Amazon.com: West Bend 84755 5-Quart Oblong Slow Cooker

I fall more in love with my slow cooker every year. It's an older West Bend model, but similar to the one shown here. The base doubles as a non-stick griddle and has an adjustable temperature setting (1-5). The pot is metal with a non-stick interior and can be used in the oven, on the stovetop, or even on a grill, and is dishwasher safe.

The slow cooker is unlike a "crock pot" because the heat source is at the bottom. However, because of the metal construction of the pot, the heat is conducted evenly. You will be surprised how much more versatile a 1-5 temperature setting can be – as opposed to just "low, med, hi." The lowest setting is good for keeping foods warm. The highest setting will boil liquids, or is used for the griddle. For day-to-day slow cooking, and for smaller quantities of food for just the two of us, this is ideal.

Here is how I used the slow cooker yesterday for a pot roast that Bob literally gasped over.

1 4-lb. pot roast
Olive oil
Salt & pepper
3 cloves garlic, cut in half
1 can French onion soup, undiluted

On the stove over high heat, coat the bottom of the slow cooker pot with olive oil. Generously salt & pepper both sides of the roast. When the pot is pretty darn hot put the roast in and brown on both sides. Remove the pot from the stove and place on the base unit, at a heat setting of about 2 or 2-1/2. Surround the roast with the garlic clove halves, pour in the soup and put the lid on. Go to work. Come home 10-11 hours later. Shock your significant other with the news that this roast was this simple.

I love my slow cooker!

August 30, 2006

Beefy Biscuits


Beefy Biscuits. That’s the name I have given these little bundles. And, bonus: they're really cute.

Bob has been craving down-home, basic, potluck dishes so I searching for a recipe that would take less than 30 minutes to prepare, and would leave him with lots of leftovers for his lunches. Bingo. These little Beefy Biscuits were perfect.

1 can refrigerated biscuits – I used Pillsbury® Grands Flaky Layers (8 count)
1 pound ground beef
Barbecue sauce – I used Emeril’s Kicked Up Barbecue Sauce
Seasonings to taste – we added a couple tablespoons of brown sugar
Shredded cheese – I used a pre-shredded Mexican cheese blend

Preheat the oven to 350º. Brown the ground beef. While the beef is cooking, press the biscuits into a muffin pan (I used a little non-stick spray to be safe). Work the biscuits up the sides to make little cups. After the beef is browned, add enough barbecue sauce to make it “gloppy” but not too “sloppy.” Fill each cup with the meat mixture, generously top with cheese and slide into the oven. Bake for about 12-15 minutes until they are puffed up, golden brown and the cheese is melted. (I started checking after 10 min. to make sure the bottom of each cup was done enough to hold its shape, but not burned.)

This is not particularly creative – similar recipes are everywhere. But, I think you could modify it to suit a picky eater, or just to mix it up. Instead of the barbecue, I will try tomato sauce or even a can of cream of mushroom. Really anything added to ground beef to make it “gloppy” will work.

Bob took two for his lunch today, and we froze a few, so I will report back as to how they work as leftovers. Give these a try. I think even the kids would be impressed.

August 28, 2006

Mini-Review – The Upside of Anger (2005)

The Upside of Anger (2005)

Synopsis: “Yes it does. It heals. It just heals funny.”

Kevin Costner and Joan Allen perfectly play these two very imperfect characters. Allen is amazing as Terry Wolfmeyer, a suburban mother of four whose husband up and leaves them all without a word. She goes into self-destruct mode, and Denny Davies (Costner) shows up with a shoulder to cry on and a drink to cry in. Everything in her life is messy and complicated, but the film manages to keep from turning too sappy or too morose. The twist at the end is my case in point. You just never know what life is going to hand you and it's okay to have feelings about that. I loved it so much I watched it twice in one day. It’s rated R, so not for kids, and there’s one sort of graphic scene of comic violence.

August 18, 2006

Ancient Antiquing Secrets

Antique malls can be overwhelming. So many tchotchkes, so little time. Over the years, I have developed a system that works for me so that I can breeze through a sizeable antique mall over my lunch hour and usually score something to add to my various collections. It takes a little practice, and some self-restraint, but it turns an aimless trip into a surgical strike.


Go into “scan” mode. Don’t get caught in the trap of thinking you’re going to miss something if you don’t spend an hour looking at each overcrowded shelf. Just scan. Typically vendors group like objects together, making it easier for you. Just give each area a quick once-over, and keep moving.

Don’t waste time. If you have lots of time on your hands it’s fun to look at the high-dollar items, but if it’s outside your price range and you are on a time limit, don’t bother. In the same way, if you have a cabinet overflowing with glassware, you probably don’t need another set of glasses. Skip it and keep moving.

Have a mental list, but be flexible. My list includes: metal picnic baskets, enamelware, diner mugs with logos and inexpensive metal trays. Having a mental list gives you some focus, but don’t limit yourself or you could end up frustrated and disappointed. If you see something that’s not on the list, but you love it and can immediately think of where and how you might use it, go for it!

Go with your instincts. With a few exceptions (like maybe troll dolls), if you love it, it doesn’t break the bank and it speaks to you, grab it. By looking through decorating magazines and mail order catalogs, or watching TV decorating shows you can pick up some ideas about what styles “go together.” After that, just surround yourself with things that please you and it will come together like magic.

Relax. This is supposed to be fun! Unless you’re a dealer or serious collector, antique mall shopping is a fun way to pick up some cute things for your home that have some character and history.

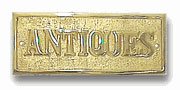
(Note: the little brass plaque shown is not an antique, but it's cute and it's available at D. Lawless Hardware for just $10.75. They also sell cabinet knobs and other hardware at excellent prices. I have made several purchases here over the years.)

Back to school time. Lesson one: Jeans.


When I start craving theme books, wooden rulers and piles of brand new #2 pencils, I know fall is almost here. And that always makes me think of back to school shopping for jeans.

Jeans are a hot topic right now, with articles appearing everywhere about the new styles and how to wear them. See a pretty comprehensive jeans matrix at Style Bakery. I personally stick to boot cut, some straight (not skinny) styles and trouser shapes. I experimented with trendier styles and they flat out do not work with my figure. If you want some good information about what works on your body type, go to What Not to Wear, where they have a handy little quiz that gives you a list of dos and don'ts for your figure.

While I tend to agree that you get what you pay for, I simply can not bring myself to spend $150-200 on a pair of jeans. For that much money they would have to have some kind of magic powers. I am a born bargain shopper, so I scour the clearance racks and usually come up with decent jeans at a discount price. Like my recent score: Gap original boot cut jeans. I picked these up at the Gap in my town, but online they are discounted from $58 to $19.99. These fit but are not too tight, not too low and not too flared. And for TWENTY BUCKS!? I dress them up with heels and a jacket, dress them down with a polo and skimmers, and in between with a camisole and espadrilles – they go with everything.

With that little nip in the air in the mornings, I know I'll soon be wearing my bargain jeans with sweaters, too. Try some on and see if they make the grade for you.

August 17, 2006

Camping cleanup made easy. Palmolive Dishwipes.


We love making big, elaborate meals while we're camping. There's just something about good food cooked outside. But, with the big meal comes the big cleanup. One thing that has worked for me and is standard issue in my camping gear are these little Palmolive Dishwipes. I went to the Palmolive website and could not find them in their product listing, so they may be discontinued (I hope not!), but I did see them available at quite a few online retailers. The beauty of these dishwipes is that you don't have to pack a bottle of dish soap and run the risk of it leaking in your storage container. They come in this cute little container, and you just wet one to produce loads of suds. One cloth has always been enough for a whole dishpan. Then you just toss it. No wet sponge or dish cloth to deal with. I don't think they are very cost effective for at-home use, but they are worth it to pack for camping cleanup. Try them.

August 15, 2006

L.L.Bean Boat and Tote®. As serious as a tote can get.


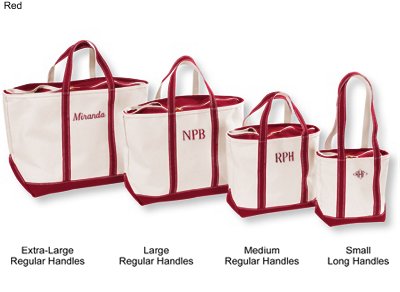
What appeals to me about L.L.Bean’s Boat and Tote Bag is its uncompromising sturdiness. It does not try to be “cute” or “elegant” – it’s far too busy boatin’ and totin’. And not only is it a seriously constructed bag, it’s available at a seriously good price. J.Crew introduced the same style of tote this year (theirs is called the Montauk tote). Their large is about the same size as Bean’s extra large, but it’s $41 more. Anything cheaper than the L.L. Bean bag is compromising on quality somewhere, mostly in the fabric. This canvas is like iron.

I currently own two Boat and Tote bags – one extra-large zip top (regular length handles) and one small open top (long handles). We use the big zip top bag for weekend trips, and it’s usually large enough to fit everything I need for two nights and three days. For camping, it will hold all of what Bob and I both need for an overnight trip. It’s cavernous. The small one is my most recent purchase and I love it. It makes a perfect little book/misc. tote to take on trips, or a casual everyday purse that’s big enough to throw my lunch in with my wallet and girl kit. It gives a little nautical feel to my outfit, which is one of the big trends of the summer.

I have stayed with the classic old-school colors, because for some reason they look fresher to me than anything "new." Checking the sale section can yield a bargain when they discontinue colors. That’s how I got my small one on sale, in a cranberry red, so since I was saving money, I added a monogram. I am considering a medium sized Boat and Tote, too. Although I don’t have an immediate use in mind, I will bet my deck shoes I will reach for it over and over again. Try one.

August 14, 2006

Caramelized Onions – A Recipe's Little Black Dress


The little black dress – perfect for any occasion, easily dressed up or down and never goes out of style. That's how I am beginning to look at caramelized onions.

In my recipe for "French Country Steaks" I used them to take the place of a can of French onion soup. The dish took longer to bring together, but the result was a richer flavor.

Bob suggested we caramelize an onion to add flavor to a pot roast we made while camping this past weekend. When combined with some beef broth, red wine, garlic and other seasonings, the gravy it produced was spectacular.

There isn't any big, complicated secret to caramelizing an onion. Over about medium heat, I start with equal parts butter and olive oil, about 2T each. Then I thinly slice the onions and throw them in the pan with some salt and pepper. Stir them around to coat all the bits with the oil/butter mixture. The onion will start to wilt, turning translucent. Stir them every now and then and keep going. If the skillet gets dry, or if the onions start to stick, just put a little more oil in, or even water or beef broth. Not a lot, just enough to keep the onions moving. When they start to turn brown, don't panic. This is what you want. Just keep waiting and stirring until the onions are a nice deep, dark brown – that's the caramel color you're looking for. This takes me about 15-18 minutes from start to finish.

I found a pretty good how-to article with pictures at All Recipes. The photo above is from Hormel Foods website, and they have step-by-step instructions, too.

If you haven't tried the little black dress of food, I highly recommend it. It's worth the time you will invest, because your dish will have a deep, rich but sweet flavor.

August 10, 2006

A Credit Card Warning

Whatever you do, do not cash a check sent to you from any credit card company, or you may be signing up for something called "Shopper's Advantage" without knowing it.

I don't usually write about things like this, but I feel the need to warn you about a pretty sneaky scam that I fell victim to. A few months ago I signed up for an Amazon.com® Visa® card, through Chase, because they were running an online special. By signing up you got $20 off your purchase on Amazon and a bunch of other benefits. I went for it, because I knew that the card would only be used for a few purchases, mainly gifts and mainly from Amazon. I ended up using the card quite a bit, and started managing my account online at Chase.com. I even took advantage of a balance transfer special that Chase was offering.

Today I was online checking to see when a payment was due, and noticed a charge of $9.99 to someplace called "TLG•Shopper." Well I know for a fact I have not used this card for any purchases of any sort since I made the balance transfer. So I looked at my whole statement and lo and behold, TLG•Shopper was getting $9.99 a month from me for the past 6 months.

I immediately called Chase to find out what this was. They transferred me to Shopper's Advantage. I was told that I activated this account when I cashed a check for $10 that was sent to me through Chase. I vaguely remember getting a check in the mail and, thinking it was part of the promotion Amazon.com was running, I went ahead and cashed it. I think of myself as a pretty smart person, so this Shopper's Advantage thing must have been buried in some fine print somewhere, because I was COMPLETELY unaware that's what I was doing. I have even received checks with similar "offers" attached to them and thrown them away. This one didn't seem to have a catch to it at all.

I explained to the person at Shopper's Advantage that I wanted to cancel my "account" immediately. I got a pretty involved sales pitch to try to get me to keep the account – to which I stated that if I didn't even know what it IS, and if I was deriving NO benefit from it, was WHY would I keep letting them take $9.99 of my money every month! I know it probably does no good, but I told the person that this was a very sneaky way to take money from people, and that I will dispute every charge made to my account until this is made right.

Don't do what I did. At the very least my advice is to read every tiny bit of small print before cashing these little checks. Even then you may not catch it. Best to just pitch them. A little $10 check may end up costing you $60 or more. And, check your credit card statement carefully to see if you have accidentally fallen victim to this scam.

August 06, 2006

Mini-Review – V for Vendetta

V for Vendetta (2005)

Synopsis: Down with totalitarianism. Up with people in masks and capes. To the music of Tchaikovsky's 1812 Overture.

You can enjoy this film just at the surface (as Bob does), or dig as deep as you want (and there is a lot under there). Lots of symbolism gives you plenty to mine. Look up the Guy Fawkes historical references and some of it will make a lot more sense.

I had to hand it to Natalie Portman – playing opposite a masked man in a cape can’t be easy – but she fills the role out and makes it work. (And, she looks good bald, a plus in this role.) The Orwellian plot is familiar, but there are a few surprises, too. It's stylish, interesting and (if you go there), thought provoking. I recommend it. The R rating makes it not for kids – there are some scenes of torture, some upsetting images, and violence.

July 27, 2006

L.L.Bean Double L® Polos. I have never found a better value in a polo.


Bob is a "polo and khakis" kind of guy. Always has been. But, most of his polos had seen better days. Much better. Not that he didn't have name brands hanging in the closet, he did, but in looking through them there were several things I noticed. After they had been washed a million times, most of them faded and had some pilling. Also, on many of the polos the collars developed a weird stiffness and some had permanent creasing that I couldn't beat out of them with a hammer.

I started looking for the perfect polo for Bob. Something soft, with a classic cut (none of that "athletic cut" for him), that could run through the wash and come out looking perfect every time. I of course thought I was dreaming, until I decided to try a few Double L Polos from LLBean. I got him three colors to start with, a gray, a mustard and navy.

Everything LLBean says about this polo is dead-on. Not only do they have a really soft feel, but they maintain that softness wash after wash. They did not shrink one bit, and they come out of the dryer wrinkle-free (they do have an actual wrinkle free style, but I just went for the regular ones as shown). Bob loves the way they feel, and I LOVE the price: $17.50. In my opinion they are preferable to the RL polos he had, and at less than half the price.

I'm going back for more today, and I am going to try one of the women's versions for myself. How can you go wrong with a classic from LLBean!?

Update (8/10): I finally received my LLBean Double L polo for women. Just exactly the same soft feel and nice drape as the men's version. The description says that it is slightly fitted and cut for women, but it is definitely boxier than the more contemporary women's polos out there. However, I liked it for its retro/classic feel. Because it is relaxed and comfortable, will be the perfect golf shirt with walking shorts or cropped pants, and it looks just as cute with jeans. I recommend it.

Bad hair days? Flatten them.


For me, hair styling has always been a hit-or-miss proposition. I have "accidentally good" hair days, but I can't seem to string them together because I can't remember what I did right. I recently embarked on a quest for no more bad hair days, hoping to use some new technology and some new product to come up with a system that works for me.

My first step was to upgrade a couple of personal care items in my drawer. First to go was the vintage blow dryer, in favor of a new one with ionic and ceramic technology. It was not a top of the line dryer by any means (it's a Vidal Sassoon one I got at Ulta for about $13), but combined with an ionic/ceramic brush (about $9), my hair is salon-soft.

While my hair was now as soft as I wanted it to be, it still had a mind of it's own. It flipped out on one side and in on the other. So, I went on a search for a new hair straightening iron. This is the one I picked up: the Conair Ultra Slim Straightener - CS4JCS for $17.99 at Walgreens. Unlike a little travel straightener I had used before, this one heats up in literally 60 seconds or less, it has really comfy handles and it stays consistently hot. I never had to hold the plates on any section of hair, rather I just slid the plates down the strands and got the effect I was looking for – hair that still has some bounce, but is controlled. I get consistent results in 5 minutes or less.

So, how will this work into my morning routine? I typically wrap my hair in a microfiber towel while I put on my makeup (see previous post), so by the time I get around to drying it, it’s just barely damp. I apply some straightening gel (currently using Paul Mitchell), and then clip my hair into sections and dry, starting with the back and bottom layers and working up. At this point I am not worrying about getting it straight, just getting it dry. Then, I plug in the straightener and tidy up for the 60 seconds it takes to heat up. I section my hair the same way and straighten. My goal is to control it, not to make it super-extra flat, so I am not spending a lot of time on any section.

Total time spent on my hair should now be in the 10-15 minute range. Not bad. And the bonus is that the time I save can be converted into sleep time!

July 21, 2006

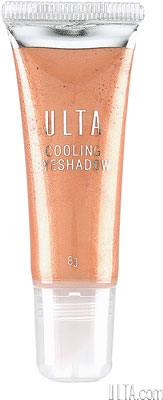
Cool summer eyeshadow (literally), and mineral makeup that doesn't break the bank.

I am not a beauty product maven by any means, but occasionally I run across things that work pretty well for me. If you don't have an Ulta store near you, you can go to their website to find these (and lots more).

The first is called Cooling Eyeshadow. I haven't used a cream eyeshadow in years, so they must have been improved since... oh, say the 70s. It comes in three colors, Sunkist Pink, Bronze Shimmer, and Gold Glow. Pink shadow makes women my age look like we've been crying, so I chose the Gold Glow. It goes on with a slight "cooling" sensation, easily blends and all I need is a touch of liner and some mascara and it's a simple, less-than-five-minute look that I have been wearing all summer.


The second product is Ulta's own mineral makeup. I decided to try mineral makeup a while back, but I was very dubious at first. After all, they tell women of a certain age that powder tends to settle into fine lines, making us look older. Egad, anything but that. However, this type of makeup provides good coverage without any kind of heavy feeling and low and behold it's nothing like wearing powder. Bonus, the minerals are supposed to have some extra goodies like antioxidants that are actually said to improve the condition of the skin. I was a convert, but OUCH, the Bare Minerals I was using was pretty pricey, $25.

When I ran out of the Bare Minerals, I noticed that Ulta had come out with their own brand, and at $14, it was tempting. It came in fewer colors but one that matched what I was using so I grabbed it. What's the worst that could happen? I notice no real difference in the way the Ulta mineral makeup goes on, the coverage is the same and it feels as lightweight as the expensive stuff. I actually like the Ulta packaging better, because it has a transparent, domed lid, which is where I put the powder on the brush. It's not often you find something cheaper that works the way the expensive stuff does.

Both lines are available at Ulta, so you could try both yourself and see if you notice a difference. I will take the savings and go have myself a double-shot Brevé instead!

July 19, 2006

Keep it neat. Use a tray.

I can’t claim this idea as my own, but I do use it and it works. It came from a little book someone gave me called
“Simplify Your Life: 100 Ways to Slow Down and Enjoy the Things That Really Matter”
by Elaine St. James. The book has a lot of practical tips you can implement, and some others that are less practical for the way we live.

The goal of this particular tip is to reduce the number of times you have to vacuum (a good goal in my life) by reducing the amount of crumbs, drips and messes created when the family takes food into the family room.

Truth is, many of us eat meals and snacks in front of the television, and it’s not very realistic to demand that they eat only in the dining room. So, as the book suggests, I initiated the “Tray Program.” Every time we took our meals or a snack into the family room, we put everything on a tray. The tray went on the ottoman or our laps, forming a “TV tray.” The bonus of the Tray Program is that you actually have everything you need right on your tray – your food, your drink, silverware a napkin and even salt and pepper. So, you aren’t running back and forth to the kitchen. When dinner’s over, the trays simply get a wipe-down and they’re put back. Notice how many crumbs and drips are on the trays, and you’ll realize that those crumbs and drips could have been on your furniture or floor.

I had some fun with this. I went to a few antique stores and found some nostalgic old metal trays that were very inexpensive – less than $8 a piece. I started collecting them in just about every shape and size. Some are the “full meal” size, and some are just right for a snack and a pop. You could snap up some cute plastic trays at Kmart or Wal-Mart and they would work great, too. Stash them away or keep them out in sight, either way just insist that every time someone takes food out of the kitchen it goes on a tray.

When someone calls you a “neat freak” or OCD, just smile and thank them and imagine how much more they have to vacuum than you do.

July 12, 2006

No-crust Broccoli and Ham Quiche


This is a very slight modification of recipe for no-crust quiche. Perfect for low-carb eaters, they turned out puffy, golden brown and delicious.

You'll need:
1 package (10 ounces) frozen broccoli florets
3-4 slices of deli ham, cut up
6 large eggs
1/2 cup half-and-half
About a cup of crumbled sharp cheddar cheese
Salt & pepper to taste

How to:
Preheat your oven to 350º.

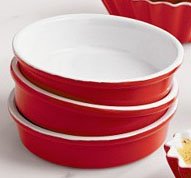
Spray four ramekins with non-stick spray. I used these little creme brulée dishes from Crate & Barrel (shown). The recipe filled four just perfectly, and they looked even more like little individual quiches.

Microwave the broccoli, then drain and let cool while you combine the eggs, half and half, cheese, ham and s&p. Cut the broccoli into smaller pieces if you need to, then add to the egg mixture.

Put the ramekins on a rimmed cookie sheet and ladle the egg mixture evenly into each one.

Bake for about 40 minutes until puffed and golden brown.

There's really nothing to it. I have three left over, which I took out of the ramekins and put in plastic for breakfasts for the next few days. I think they should reheat pretty well in the microwave.

This is one of those recipes I can see myself changing up, substituting vegetables and cheese for a different flavor profile. Instead of the broccoli I could see using fresh zuchinni or asparagus or a carmelized onion.

Update: Reheated one for about 1.5 minutes in the microwave this morning and it was just delish. My next experiment will be to freeze them, which should work fine because regular quiches can be frozen for about a month after baking. A bunch of these in the freezer and I won't have to worry about breakfasts during the work week!

Second Update 7/26: I have made this recipe three times now, once with asparagus and once with just ham and cheese. The plain ham and cheese tempted Bob to try them, and he's hooked. I will be making these on a very regular basis.

On another note, I decided to research the origin of the recipe. I had originally seen this recipe on a blog and the author credited it to Martha Stewart. It may have been originally hers, but crustless quiche recipes are all over the place, popular on low-carb recipe sites as well as mainstream cooking sites. So, if it was Martha's to start with, it's everyone's now. Bon appétit!

July 11, 2006

Rachael Ray is looking for tips from US!

Submit Your Tip to Everyday with Rachael Ray!

If you have a hot kitchen tip, submit it on Rachael Ray's "Everyday" website for a chance to get a free year's subscription to the magazine AND get your tip published. I tried my hand with this idea:

"This has become such a natural for me I didn't even think of it as a "tip" until now! I keep a little set of four vintage dessert plates stacked up on the counter next to my stove to use as spoon rests. When I'm cooking a big meal and need more space for utensils, I just slide the top one off, and there's the next clean one in line. I'm never out a place to rest my spoon or tongs when one of the little plates is in the sink or dishwasher. Note: I think a set of old mismatched saucers would work too, and mixing up the patterns to match your decor could be fun."

July 10, 2006

Mini Review – 16 Blocks

16 Blocks (2006)

Moral of the story: Don't stop at the liquor store with only 12 more blocks to go.


Not particularly original - bad cops, good cop, mouthy witness - but I liked it. Bruce Willis is not the quintessential do-gooder in this flick, instead, he's a former cop-on-the-take-turned-alcoholic who is trying to prevent his former bad-cop partners from killing the witness to save their own skins. Frankly, it looks at times like Willis' character Jack Mosley, is trying to commit semi-slow suicide the odds are so stacked against him. So, it's a little contrived. So, it's pretty predictable. So, crime never pays. I still recommend it b/c it's an entertaining, solid movie that draws you in as far as it goes (which is about "that" far). Lots of shootings, people cuss some, but surprisingly it is only PG-13.

June 28, 2006

Steak Cooking Chart


Earlier when I was writing the "French Country Steak" recipe, I remembered an old meat cooking method my mom had told me about. She said that you knew when to flip the steaks when "the blood came up." The fact is, that always works for me, because it's a visible sign of when I should turn. It produces a medium steak every time.

I realized that whole "blood" thing sounded a little crazy so I did a search to see if I could find any corroboration of that tip. Turns out she was right.

Check out Ask the Meatman™. This site describes it as "meat juices bubbling up through the steak" and "moisture pooling on top surface." I suppose that sounds a bit more appetizing than "blood coming up," so I changed my previous post.

The chart on this page seems to be farily foolproof if I think about how my mom used to cook steaks. You watch the steak for how much "juice" is coming up, and turn it according to how done you want your steak. For more well done, you just leave it longer on the second side.

The other hot tip is that you never want to turn a steak over and over. The Meatman™ says that dries out the surface of the steak. No matter how bad I want to flip and flip, I will restrain myself! It will mean a better steak!

Perfecting the recipe for "French Country Steaks."

Here's a slight modification to the "French Country Steaks" recipe I wrote about earlier. This was actually an improvement over the original recipe, and I will for sure make it just this way again with no changes.

One note. I have discovered that all cube steaks are not alike. I think the success of this last batch was due in part to the fact that the steaks were a bit thicker, and obviously just better quality meat.

That being said, here was the revised recipe:

You'll need:
4 cube steaks
2T olive oil
1 garlic clove
1 can French onion soup
1 8-oz. container sour cream
1 lb. sliced mushrooms
salt, pepper, Mrs. Dash original

How to do it:

1. Salt & pepper both sides of the steaks, then sprinkle with Mrs. Dash original spice blend (yes, I am addicted to this stuff now).
2. Run about 2 T olive oil around a pretty big, deep skillet (with a lid you will need later) and let it heat over high heat.
3. Put the steaks in (don't crowd the pan), don't cover and don't bother them.
4. Meanwhile cut up one large or a couple small cloves of garlic.
5. When moisture pools up on the top of the steaks, flip 'em. Then leave them alone again.
6. When you see moisture on the second side, take the steaks out and put them on a plate and loosely cover w/foil (not tight). They will be medium at this point.
7. Add 2T butter and the garlic to the pan. Wilt the garlic, but don't burn it.
8. Add the French onion soup, undiluted. Stir, scraping up the brown bits.
9. Whisk in the sour cream.
10. When it's smooth and bubbling, add the steaks back in (and the juice from the plate). Turn them once to coat with the gravy.
11. Toss 1 lb. fresh sliced mushrooms all around the pan and on top of the steaks. – I bought mine already sliced to make it faster.
12. Cover and turn heat to low & simmer for about 15 minutes.

For Bob, I served w/biscuits and noodles to sop up the gravy. I had mine with some steamed cauliflower that I poured gravy on and it was low carb and delicious.

I am thinking you could use the same basic principles but give it a different twist if you used a can of diced tomatoes instead of the French onion soup added some diced onion in with the garlic and changed the mushrooms to sliced green peppers. That would make more like a Swiss steak.

There may be other alternatives... Have fun, be creative! The worst that happens is you throw it out and order in. After all, cube steaks hardly break the bank!

June 22, 2006

Update on Mrs. Dash Butter

As a follow up to my previous article about mixing Mrs. Dash seasoning blends into butter for use on corn, I am happy to report that other seasoning blends work equally well to the original blend. I used a capful of the Southwest Chipoltle blend and mixed it into 6 T of softened butter. I again slathered it on some sweet corn and wrapped the ears in foil and threw them on the grill, and we also put a pat on our steaks. Delicious. Why would I ever go to the trouble of mixing my own spices for a quick seasoned butter when these blends work very well and taste great.

Thought you should know.

June 20, 2006

Mini Review – The Big White

The Big White

Synopsis – Fargo meets Weekend at Bernies

Rating – ha. eww. eh.

I laughed a little, I was grossed out quite a bit, but hey, it's called a "black comedy." My new definition of black comedy is any film that uses the dismemberment of a corpse as a primary sight gag. Despite that, I really enjoyed Holly Hunter, and I thought Alison Lohman was a bright spot, playing a woman who you really believe wants to help people, but she's just sort of oblivous. There were only two things (okay, maybe I'm being generous) that really bugged me. Number one, I am sick and tired of seeing Woody Harrelson play a psychopathic weirdo, and number two, Robin Williams' accent came and went throughout the movie – where exactly was he supposed to be from!? There is a lot of foul language, and some gross scenes with the dead body, so not for kids.

June 13, 2006

Mini Review – Stay

Stay

Synopsis – somewhere between alive and dead is a lot of weird stuff

Rating – try to "Stay awake"


Really visually interesting. And except for the high water pants, Ewan McGregor is as hot as ever. But, it's like that one guy you knew in high school that just tried way too hard to be deep and came off looking silly and pretentious. I can't say definitively to "stay away"... I just found it hard to "Stay awake." There are some kind of shocking images, so it's not for kids, but no kid I know would be interested in this film anyway.

June 08, 2006

"America's Top Recipes" contest on All Recipes


You already know how I feel about making up my own recipes...so you can imagine how my little brain started whirring when I ran across this: Recipe Contest. The prize is $10,000 and the recipe is printed in USA today as well as posted on the All Recipes site. You can enter online in any of these categories: International, Kid Pleaser, Holiday Family Favorite, Healthy Pleasures, or Super Quick Suppers. You have to click the "submit" button no later than July 7th, so preheat the oven and get cookin'!

Mini Review – Hustle & Flow

Hustle & Flow

Synopsis – everybody's gotta dream...of being a rapper?

Rating – it's hard out here for a viewer

I kept watching this flick, although a couple of times I wondered. I have feelings about the subject matter (like I don't buy that someone "accidentally" becomes a pimp and drug dealer, comeon), but there was something about Terrence Howard's performance that kept me from just bailing on the whole thing. FYI: the theme song "It's Hard Out Here for a Pimp" won best original song in the 2006 Academy Awards.

Here's my takeaway from the movie. Becoming a successful rapper is like believing in Santa Claus. If you "believe with all your heart" it comes true.

There's a lot of offensive language and obviously sex & drug content. Not for kids or teens.

June 06, 2006

Five-ingredient recipe: cube steaks "French Country" style.

If you don't count the salt, pepper and a little parsley, this recipe literally has five ingredients. If you don't have sherry, leave it out and it's only FOUR ingredients! I based this off of several recipes I have seen, but modified to have fewer carbs (no flour!).

4 Cube steaks, salt & pepper both sides
1 T Butter
1 Can French onion soup
1/2 Cup sour cream
1 T Sherry

Just brown the cube steaks on both sides in a little olive oil over pretty high heat. I did them 2 at a time to keep from crowding the pan. Put them on a plate under loose foil. Keep the heat at about medium. Add the butter and let it melt, then add the onion soup, scraping up the brown bits. Salt, pepper and add the tablespoon of sherry. Wisk in the sour cream and let the gravy simmer a bit to thicken. Put the cube steaks back in the pan and cover them in the gravy. Simmer over low heat for about, oh, 15 minutes more or less. They cook really quickly, so this is more about letting them soak up the flavors of the sauce.

Bob loved this with biscuits to pour more gravy over. I'll make them again. The other bonus is they are so CHEAP! But for some reason, this recipe makes them just a TAD more elegant.

June 05, 2006

Simple idea. Mrs. Dash butter on sweet corn.


Corn on the grill is always good, but this time I did ours a little different and Bob says he never wants it any other way. The sweet corn was already out of the husks, so my plan was to wrap each ear in foil and throw them on the grill. But, I made up my own "herb butter" and slathered each ear with it before wrapping and it just really brought out the flavor. I mixed together about 1/2 stick of softened butter, and a couple of teaspoons of regular old Mrs. Dash seasoning blend. I used Original Blend, but I am anxious to try it with some of the other varieties to change up the flavor profile. The next night we didn't have the grill going, so I just put the corn in a glass baking dish, dotted the butter all around, covered it with plastic wrap and microwaved it until it was done. It was just as good as on the grill.

I could see us using a Mrs. Dash butter on any vegetable, and I could even see putting a pat of it on a just-grilled steak. I know this isn't a totally original idea, but the fact that the Mrs. Dash spice blends are... well, already blended... means you only have to get ONE thing out of the spice rack instead of 20. Try it and let me know what you think.

May 26, 2006

In praise of Rubbermaid® containers.


I just don't know what I would do without Rubbermaid storage containers.

Camping season starts for the Kings this weekend. And that brings out all my feelings of gratitude to Rubbermaid®. Camping for most people is "roughing it" in tents and cooking with sticks and things. Why put ourselves through that!? Don't get me wrong, we we don't bring a television or a generator, and we do sleep in a tent, but we're not very "crunchy" about camping. We take everything we need to make it comfortable and fun - including the kitchen sink (literally two Rubbermaid dishpans).

One container is the "utility room," and includes the propane for the camp stove, fire making supplies, citronella candles, fly swatter, bungee cords, duct tape and the like. One is the "kitchen" and holds the pots & pans, coffee pot, dish pans & drainer, etc. Then there is the "buffet" which holds the dishes, tablecloths, serving bowls and platters and napkins. Two smaller, clear containers are the "cabinet under the sink" – holding everything from the foil and storage bags to the dish soap and Formula 409. The smallest container is the "silverware drawer." Finally, there's the "bathroom" which holds the sunscreen, bug spray, baby wipes, etc. Everything has a place, and everything is easy to find.

Bob just shakes his head because sometimes he thinks I get carried away. BUT, when we get to the campsite and he asks me IF we brought something and I produce it "voila" out of a Rubbermaid container, he is glad that I do what I do.

Thank you, Rubbermaid. For helping me win the "most organized camper" award.

May 23, 2006

Mexican "lasagne." Not too shabby.

This was sort of a made up recipe, an adaptation of a couple I had read and liked the sound of. I thought I would share because it turned out well and it was relatively easy.

Preheat the oven to 350º.

For the meat layer:
About 2 lbs leftover roast beef
1 pkg. taco seasoning
1 sm. can diced green chilis, with juice

Shred the beef into a pan. Add the taco seasoning and stir to make sure all the meat is coated. Add the can of green chilis. The juice from the chilis will help it become more "loose."

For the cheese layer:
1 can cream of chicken soup, undiluted
2 cups (1 package) shredded Monterrey Jack cheese
1 cup sour cream
Aprox 1 tsp. each cumin & chili powder

Mix all together in a medium size bowl.

For the dish:
1 cup jarred salsa, divided
4 9" diameter tortillas (I used low carb multi-grain, but I think any kind would be fine)
1 cup shredded "taco" cheese blend

To assemble:
Spray a 9x13 Pyrex dish with non-stick spray. Put about 1/2 the salsa in the bottom of the dish and spread out. Lay two of the tortillas on top of the salsa, they will overlap. Put the beef mixture on top of the tortillas. Top that with about 1/2 the cheese mixture. Pour the rest of the salsa on top of the cheese. Lay the remaining 2 tortillas on top. Spread the rest of the cheese mixture on, then top with the shredded taco cheese.

Bake in a 350º oven until the cheese is bubbly and the top is a light golden brown, approximately 30 - 45 minutes. Serve with additional salsa.

Bob liked it enough to save the leftovers for the next day. That is a good sign!

May 19, 2006

iPod Shuffle. No bells. No whistles. Perfect.


Okay, I may be the last person on the planet to get a digital music player. But the dogs and cats apparently pooled their money and got me one for Mother's Day. They wisely chose the iPod Shuffle for their human mommy, which is perfect for me.

Unlike the 20-somethings I work with, I don't need all the bells, whistles, screens, options or the like. I just need something that holds about 100 songs, and can block some noise at work when I need to concentrate. In fact, much to their chagrin, I will probably load it right up with Vivaldi and Mozart. The "shuffle" mode turned some people off, but you do have the option of listening to your list straight through or mixing it up, and obviously you control what you put on it to listen to, so to me that's not an issue.

I will tell you that I do have to send mine back for an exchange under the Apple warranty. After walking through some steps in an online chat with a service person, it was determined that my little baby had some hardware issues, so they will be replacing it for me. Thank goodness for easy online registration!

Anyway, if you want a little music, in a teensy little package, for not a lot of money (under $80 for the 512MB) the Shuffle might be just the thing.

May 09, 2006

Happy cooking accidents happen. My new tequila lime chicken recipe.

If the accident turns out something delicious, just pretend like you meant to do that!

Last evening my plan was to make tequila chicken from a recipe I found on Atkins website. Their recipe called for:

1/4 cup vegetable oil
1/4 cup finely chopped fresh cilantro
1 1/2 ounces tequila
1 1/2 tablespoons ground cumin
1 tablespoon chopped garlic
1 teaspoon salt
1/2 teaspoon black pepper
1/8 teaspoon cayenne pepper
2 pounds boneless, skinless chicken breast halves

Basically the instructions had you make a marinade, toss the breasts in it for a second, take them out and bake at 400º on a sheet pan. That sounds fine. But I like to vary a bit, and wanted to add some lime juice. I was also not into getting all tense about exact measurements. It's just a marinade after all. So here were my ingredients, mixed right in a shallow baking dish:

few glugs of vegetable oil
big handful finely chopped fresh cilantro
glug and a half tequila (probably about 2 parts oil and 1 part tequila)
half a lime squeezed real good
couple teaspoons ground cumin
some kosher salt, like maybe 1/2 teaspoon
few grinds black pepper
2 pounds boneless, skinless chicken breast halves

I tossed the chicken in the marinade, turned them a few times to coat, left it all right in that dish and threw it in the oven. About 20 minutes in I realized my error. I didn't take chicken out of the marinade. By the time I checked them, they were about 1/2 covered in the marinade, mixed with their own juices. I was a little nervous, but decided to let it go.

This turned out to be the juciest baked chicken I have made in quite a while. Honestly it was almost like the breasts were poached in the liquid, which helped keep them nice and moist. They weren't exactly gorgeous and brown, but I had made an avocado sauce to put on them, so it didn't really matter. (The avocado sauce was one whole avocado, about a half cup of mayo, the juice of the other half of the lime I had cut, some salt & pepper, about a teaspoon of cumin and a shake or two of some dark chili powder... in a blender, delicious).

My next alteration of this recipe will involve pounding the breasts thin, pan searing them in some oil and the spices and probably some garlic, deglazing with the tequila and lime juice and finishing in the oven. Who knows, that might work out too.

I'm starting to relax a bit in the kitchen, which makes it a lot more fun. And when Bob says "you can make that again!" I just hope and pray I can remember how I did it!

May 03, 2006

The must-have for every purse. The Girl Kit.


Years ago I purchased a little Coach accessory bag in red leather in an attempt to organize my purse. This little bag turned into my Girl Kit. There are many like it, but this one is mine.

The first item, and the cornerstone of any Girl Kit is a Leatherman. Mine is a Leatherman Micra, but these days Leatherman manufactures lots of small utility tools that would be perfect. Find the one you like and put it in your Girl Kit. You will be shocked how many times you pull it out to snip threads or tighten sunglasses. You will also get a kick out of how many times your man asks to borrow it!

The next most important item in the Girl Kit is my mini Mag Lite. Every girl needs a small flashlight. Mine is red, so it's cute, and I think it still has the single AAA battery I put in it 8 or 9 years ago. I don't use it a lot, but it's nice to know it's in there.

Other necessary items in the kit: a teeny pen, a golf pencil, a hotel sewing kit (button, thread, needle, etc), a safety pin, a 2-pack of pain reliever, a few hand wipes, a couple of band-aids, a tiny mirror, small nail clippers, a nail file and a mini-pad. You can modify to your heart's content, and add things that fit. A tiny tin of hand cream, a divot tool and a lip liner have been in my kit.

Stock up your Girl Kit, transfer it to whatever purse you're carrying, and you will win the "Most Organized" award among your friends and family!

May 02, 2006

Coffee stain? What a pain.

So a co-worker of mine was commenting on the new jacket I’m wearing today (see previous post, Bargain Safari). I threw it on over a white polo tee from LaRedoute, khakis from Target and some new white espadrille slides. Going for the all-natural look and feeling pretty good about myself. She said that wearing the collar up was a good choice, because it hid the big coffee stains on my white shirt. At first I thought she was kidding, but alas. Two big drippy drops right on my pristine white top. Agg.

So I ran to the office kitchen and pulled out one of these little Coffee Wipes. I figured the least it could do is lighten the stains so I would not be so self conscious all day long. My stain had been there a while, because it was almost dry. But, I followed the directions and rubbed and rubbed and blotted and while I now have a big wet spot on the front of my top, the coffee stains are almost gone. I was very surprised, because historically my experience with any kind of wipes like these has been disappointing.

So I checked the package, went to the website and found out that these are different because they are enzyme cleaners, not the usual chemical cleaners. So the way they work is to actually break down the coffee stain. If I had got to the stain while it was still wet, I may have had 100% stain removal, but I will settle for 90-95% so I don't feel like I have a large brown target on my chest all day.

One of these will probably make its way into my "girl kit" so I am prepared the next time. Try them out.

(Girl Kit contents to be covered in a subsequent article.)