August 31, 2006

Perfect pot roast in the perfect pot – my slow cooker.


Amazon.com: West Bend 84755 5-Quart Oblong Slow Cooker

I fall more in love with my slow cooker every year. It's an older West Bend model, but similar to the one shown here. The base doubles as a non-stick griddle and has an adjustable temperature setting (1-5). The pot is metal with a non-stick interior and can be used in the oven, on the stovetop, or even on a grill, and is dishwasher safe.

The slow cooker is unlike a "crock pot" because the heat source is at the bottom. However, because of the metal construction of the pot, the heat is conducted evenly. You will be surprised how much more versatile a 1-5 temperature setting can be – as opposed to just "low, med, hi." The lowest setting is good for keeping foods warm. The highest setting will boil liquids, or is used for the griddle. For day-to-day slow cooking, and for smaller quantities of food for just the two of us, this is ideal.

Here is how I used the slow cooker yesterday for a pot roast that Bob literally gasped over.

1 4-lb. pot roast
Olive oil
Salt & pepper
3 cloves garlic, cut in half
1 can French onion soup, undiluted

On the stove over high heat, coat the bottom of the slow cooker pot with olive oil. Generously salt & pepper both sides of the roast. When the pot is pretty darn hot put the roast in and brown on both sides. Remove the pot from the stove and place on the base unit, at a heat setting of about 2 or 2-1/2. Surround the roast with the garlic clove halves, pour in the soup and put the lid on. Go to work. Come home 10-11 hours later. Shock your significant other with the news that this roast was this simple.

I love my slow cooker!

August 30, 2006

Beefy Biscuits


Beefy Biscuits. That’s the name I have given these little bundles. And, bonus: they're really cute.

Bob has been craving down-home, basic, potluck dishes so I searching for a recipe that would take less than 30 minutes to prepare, and would leave him with lots of leftovers for his lunches. Bingo. These little Beefy Biscuits were perfect.

1 can refrigerated biscuits – I used Pillsbury® Grands Flaky Layers (8 count)
1 pound ground beef
Barbecue sauce – I used Emeril’s Kicked Up Barbecue Sauce
Seasonings to taste – we added a couple tablespoons of brown sugar
Shredded cheese – I used a pre-shredded Mexican cheese blend

Preheat the oven to 350º. Brown the ground beef. While the beef is cooking, press the biscuits into a muffin pan (I used a little non-stick spray to be safe). Work the biscuits up the sides to make little cups. After the beef is browned, add enough barbecue sauce to make it “gloppy” but not too “sloppy.” Fill each cup with the meat mixture, generously top with cheese and slide into the oven. Bake for about 12-15 minutes until they are puffed up, golden brown and the cheese is melted. (I started checking after 10 min. to make sure the bottom of each cup was done enough to hold its shape, but not burned.)

This is not particularly creative – similar recipes are everywhere. But, I think you could modify it to suit a picky eater, or just to mix it up. Instead of the barbecue, I will try tomato sauce or even a can of cream of mushroom. Really anything added to ground beef to make it “gloppy” will work.

Bob took two for his lunch today, and we froze a few, so I will report back as to how they work as leftovers. Give these a try. I think even the kids would be impressed.

August 28, 2006

Mini-Review – The Upside of Anger (2005)

The Upside of Anger (2005)

Synopsis: “Yes it does. It heals. It just heals funny.”

Kevin Costner and Joan Allen perfectly play these two very imperfect characters. Allen is amazing as Terry Wolfmeyer, a suburban mother of four whose husband up and leaves them all without a word. She goes into self-destruct mode, and Denny Davies (Costner) shows up with a shoulder to cry on and a drink to cry in. Everything in her life is messy and complicated, but the film manages to keep from turning too sappy or too morose. The twist at the end is my case in point. You just never know what life is going to hand you and it's okay to have feelings about that. I loved it so much I watched it twice in one day. It’s rated R, so not for kids, and there’s one sort of graphic scene of comic violence.

August 18, 2006

Ancient Antiquing Secrets

Antique malls can be overwhelming. So many tchotchkes, so little time. Over the years, I have developed a system that works for me so that I can breeze through a sizeable antique mall over my lunch hour and usually score something to add to my various collections. It takes a little practice, and some self-restraint, but it turns an aimless trip into a surgical strike.


Go into “scan” mode. Don’t get caught in the trap of thinking you’re going to miss something if you don’t spend an hour looking at each overcrowded shelf. Just scan. Typically vendors group like objects together, making it easier for you. Just give each area a quick once-over, and keep moving.

Don’t waste time. If you have lots of time on your hands it’s fun to look at the high-dollar items, but if it’s outside your price range and you are on a time limit, don’t bother. In the same way, if you have a cabinet overflowing with glassware, you probably don’t need another set of glasses. Skip it and keep moving.

Have a mental list, but be flexible. My list includes: metal picnic baskets, enamelware, diner mugs with logos and inexpensive metal trays. Having a mental list gives you some focus, but don’t limit yourself or you could end up frustrated and disappointed. If you see something that’s not on the list, but you love it and can immediately think of where and how you might use it, go for it!

Go with your instincts. With a few exceptions (like maybe troll dolls), if you love it, it doesn’t break the bank and it speaks to you, grab it. By looking through decorating magazines and mail order catalogs, or watching TV decorating shows you can pick up some ideas about what styles “go together.” After that, just surround yourself with things that please you and it will come together like magic.

Relax. This is supposed to be fun! Unless you’re a dealer or serious collector, antique mall shopping is a fun way to pick up some cute things for your home that have some character and history.

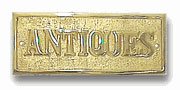
(Note: the little brass plaque shown is not an antique, but it's cute and it's available at D. Lawless Hardware for just $10.75. They also sell cabinet knobs and other hardware at excellent prices. I have made several purchases here over the years.)

Back to school time. Lesson one: Jeans.


When I start craving theme books, wooden rulers and piles of brand new #2 pencils, I know fall is almost here. And that always makes me think of back to school shopping for jeans.

Jeans are a hot topic right now, with articles appearing everywhere about the new styles and how to wear them. See a pretty comprehensive jeans matrix at Style Bakery. I personally stick to boot cut, some straight (not skinny) styles and trouser shapes. I experimented with trendier styles and they flat out do not work with my figure. If you want some good information about what works on your body type, go to What Not to Wear, where they have a handy little quiz that gives you a list of dos and don'ts for your figure.

While I tend to agree that you get what you pay for, I simply can not bring myself to spend $150-200 on a pair of jeans. For that much money they would have to have some kind of magic powers. I am a born bargain shopper, so I scour the clearance racks and usually come up with decent jeans at a discount price. Like my recent score: Gap original boot cut jeans. I picked these up at the Gap in my town, but online they are discounted from $58 to $19.99. These fit but are not too tight, not too low and not too flared. And for TWENTY BUCKS!? I dress them up with heels and a jacket, dress them down with a polo and skimmers, and in between with a camisole and espadrilles – they go with everything.

With that little nip in the air in the mornings, I know I'll soon be wearing my bargain jeans with sweaters, too. Try some on and see if they make the grade for you.

August 17, 2006

Camping cleanup made easy. Palmolive Dishwipes.


We love making big, elaborate meals while we're camping. There's just something about good food cooked outside. But, with the big meal comes the big cleanup. One thing that has worked for me and is standard issue in my camping gear are these little Palmolive Dishwipes. I went to the Palmolive website and could not find them in their product listing, so they may be discontinued (I hope not!), but I did see them available at quite a few online retailers. The beauty of these dishwipes is that you don't have to pack a bottle of dish soap and run the risk of it leaking in your storage container. They come in this cute little container, and you just wet one to produce loads of suds. One cloth has always been enough for a whole dishpan. Then you just toss it. No wet sponge or dish cloth to deal with. I don't think they are very cost effective for at-home use, but they are worth it to pack for camping cleanup. Try them.

August 15, 2006

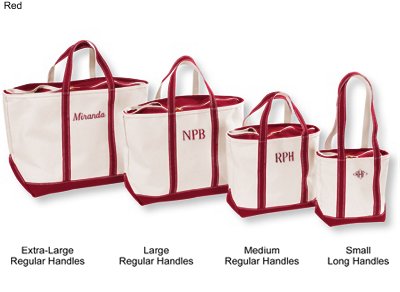
L.L.Bean Boat and Tote®. As serious as a tote can get.


What appeals to me about L.L.Bean’s Boat and Tote Bag is its uncompromising sturdiness. It does not try to be “cute” or “elegant” – it’s far too busy boatin’ and totin’. And not only is it a seriously constructed bag, it’s available at a seriously good price. J.Crew introduced the same style of tote this year (theirs is called the Montauk tote). Their large is about the same size as Bean’s extra large, but it’s $41 more. Anything cheaper than the L.L. Bean bag is compromising on quality somewhere, mostly in the fabric. This canvas is like iron.

I currently own two Boat and Tote bags – one extra-large zip top (regular length handles) and one small open top (long handles). We use the big zip top bag for weekend trips, and it’s usually large enough to fit everything I need for two nights and three days. For camping, it will hold all of what Bob and I both need for an overnight trip. It’s cavernous. The small one is my most recent purchase and I love it. It makes a perfect little book/misc. tote to take on trips, or a casual everyday purse that’s big enough to throw my lunch in with my wallet and girl kit. It gives a little nautical feel to my outfit, which is one of the big trends of the summer.

I have stayed with the classic old-school colors, because for some reason they look fresher to me than anything "new." Checking the sale section can yield a bargain when they discontinue colors. That’s how I got my small one on sale, in a cranberry red, so since I was saving money, I added a monogram. I am considering a medium sized Boat and Tote, too. Although I don’t have an immediate use in mind, I will bet my deck shoes I will reach for it over and over again. Try one.

August 14, 2006

Caramelized Onions – A Recipe's Little Black Dress


The little black dress – perfect for any occasion, easily dressed up or down and never goes out of style. That's how I am beginning to look at caramelized onions.

In my recipe for "French Country Steaks" I used them to take the place of a can of French onion soup. The dish took longer to bring together, but the result was a richer flavor.

Bob suggested we caramelize an onion to add flavor to a pot roast we made while camping this past weekend. When combined with some beef broth, red wine, garlic and other seasonings, the gravy it produced was spectacular.

There isn't any big, complicated secret to caramelizing an onion. Over about medium heat, I start with equal parts butter and olive oil, about 2T each. Then I thinly slice the onions and throw them in the pan with some salt and pepper. Stir them around to coat all the bits with the oil/butter mixture. The onion will start to wilt, turning translucent. Stir them every now and then and keep going. If the skillet gets dry, or if the onions start to stick, just put a little more oil in, or even water or beef broth. Not a lot, just enough to keep the onions moving. When they start to turn brown, don't panic. This is what you want. Just keep waiting and stirring until the onions are a nice deep, dark brown – that's the caramel color you're looking for. This takes me about 15-18 minutes from start to finish.

I found a pretty good how-to article with pictures at All Recipes. The photo above is from Hormel Foods website, and they have step-by-step instructions, too.

If you haven't tried the little black dress of food, I highly recommend it. It's worth the time you will invest, because your dish will have a deep, rich but sweet flavor.

August 10, 2006

A Credit Card Warning

Whatever you do, do not cash a check sent to you from any credit card company, or you may be signing up for something called "Shopper's Advantage" without knowing it.

I don't usually write about things like this, but I feel the need to warn you about a pretty sneaky scam that I fell victim to. A few months ago I signed up for an Amazon.com® Visa® card, through Chase, because they were running an online special. By signing up you got $20 off your purchase on Amazon and a bunch of other benefits. I went for it, because I knew that the card would only be used for a few purchases, mainly gifts and mainly from Amazon. I ended up using the card quite a bit, and started managing my account online at Chase.com. I even took advantage of a balance transfer special that Chase was offering.

Today I was online checking to see when a payment was due, and noticed a charge of $9.99 to someplace called "TLG•Shopper." Well I know for a fact I have not used this card for any purchases of any sort since I made the balance transfer. So I looked at my whole statement and lo and behold, TLG•Shopper was getting $9.99 a month from me for the past 6 months.

I immediately called Chase to find out what this was. They transferred me to Shopper's Advantage. I was told that I activated this account when I cashed a check for $10 that was sent to me through Chase. I vaguely remember getting a check in the mail and, thinking it was part of the promotion Amazon.com was running, I went ahead and cashed it. I think of myself as a pretty smart person, so this Shopper's Advantage thing must have been buried in some fine print somewhere, because I was COMPLETELY unaware that's what I was doing. I have even received checks with similar "offers" attached to them and thrown them away. This one didn't seem to have a catch to it at all.

I explained to the person at Shopper's Advantage that I wanted to cancel my "account" immediately. I got a pretty involved sales pitch to try to get me to keep the account – to which I stated that if I didn't even know what it IS, and if I was deriving NO benefit from it, was WHY would I keep letting them take $9.99 of my money every month! I know it probably does no good, but I told the person that this was a very sneaky way to take money from people, and that I will dispute every charge made to my account until this is made right.

Don't do what I did. At the very least my advice is to read every tiny bit of small print before cashing these little checks. Even then you may not catch it. Best to just pitch them. A little $10 check may end up costing you $60 or more. And, check your credit card statement carefully to see if you have accidentally fallen victim to this scam.

August 06, 2006

Mini-Review – V for Vendetta

V for Vendetta (2005)

Synopsis: Down with totalitarianism. Up with people in masks and capes. To the music of Tchaikovsky's 1812 Overture.

You can enjoy this film just at the surface (as Bob does), or dig as deep as you want (and there is a lot under there). Lots of symbolism gives you plenty to mine. Look up the Guy Fawkes historical references and some of it will make a lot more sense.

I had to hand it to Natalie Portman – playing opposite a masked man in a cape can’t be easy – but she fills the role out and makes it work. (And, she looks good bald, a plus in this role.) The Orwellian plot is familiar, but there are a few surprises, too. It's stylish, interesting and (if you go there), thought provoking. I recommend it. The R rating makes it not for kids – there are some scenes of torture, some upsetting images, and violence.

July 27, 2006

L.L.Bean Double L® Polos. I have never found a better value in a polo.


Bob is a "polo and khakis" kind of guy. Always has been. But, most of his polos had seen better days. Much better. Not that he didn't have name brands hanging in the closet, he did, but in looking through them there were several things I noticed. After they had been washed a million times, most of them faded and had some pilling. Also, on many of the polos the collars developed a weird stiffness and some had permanent creasing that I couldn't beat out of them with a hammer.

I started looking for the perfect polo for Bob. Something soft, with a classic cut (none of that "athletic cut" for him), that could run through the wash and come out looking perfect every time. I of course thought I was dreaming, until I decided to try a few Double L Polos from LLBean. I got him three colors to start with, a gray, a mustard and navy.

Everything LLBean says about this polo is dead-on. Not only do they have a really soft feel, but they maintain that softness wash after wash. They did not shrink one bit, and they come out of the dryer wrinkle-free (they do have an actual wrinkle free style, but I just went for the regular ones as shown). Bob loves the way they feel, and I LOVE the price: $17.50. In my opinion they are preferable to the RL polos he had, and at less than half the price.

I'm going back for more today, and I am going to try one of the women's versions for myself. How can you go wrong with a classic from LLBean!?

Update (8/10): I finally received my LLBean Double L polo for women. Just exactly the same soft feel and nice drape as the men's version. The description says that it is slightly fitted and cut for women, but it is definitely boxier than the more contemporary women's polos out there. However, I liked it for its retro/classic feel. Because it is relaxed and comfortable, will be the perfect golf shirt with walking shorts or cropped pants, and it looks just as cute with jeans. I recommend it.

Bad hair days? Flatten them.


For me, hair styling has always been a hit-or-miss proposition. I have "accidentally good" hair days, but I can't seem to string them together because I can't remember what I did right. I recently embarked on a quest for no more bad hair days, hoping to use some new technology and some new product to come up with a system that works for me.

My first step was to upgrade a couple of personal care items in my drawer. First to go was the vintage blow dryer, in favor of a new one with ionic and ceramic technology. It was not a top of the line dryer by any means (it's a Vidal Sassoon one I got at Ulta for about $13), but combined with an ionic/ceramic brush (about $9), my hair is salon-soft.

While my hair was now as soft as I wanted it to be, it still had a mind of it's own. It flipped out on one side and in on the other. So, I went on a search for a new hair straightening iron. This is the one I picked up: the Conair Ultra Slim Straightener - CS4JCS for $17.99 at Walgreens. Unlike a little travel straightener I had used before, this one heats up in literally 60 seconds or less, it has really comfy handles and it stays consistently hot. I never had to hold the plates on any section of hair, rather I just slid the plates down the strands and got the effect I was looking for – hair that still has some bounce, but is controlled. I get consistent results in 5 minutes or less.

So, how will this work into my morning routine? I typically wrap my hair in a microfiber towel while I put on my makeup (see previous post), so by the time I get around to drying it, it’s just barely damp. I apply some straightening gel (currently using Paul Mitchell), and then clip my hair into sections and dry, starting with the back and bottom layers and working up. At this point I am not worrying about getting it straight, just getting it dry. Then, I plug in the straightener and tidy up for the 60 seconds it takes to heat up. I section my hair the same way and straighten. My goal is to control it, not to make it super-extra flat, so I am not spending a lot of time on any section.

Total time spent on my hair should now be in the 10-15 minute range. Not bad. And the bonus is that the time I save can be converted into sleep time!

July 21, 2006

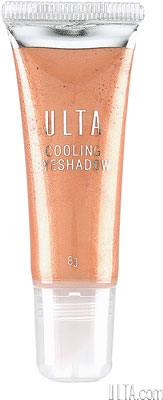
Cool summer eyeshadow (literally), and mineral makeup that doesn't break the bank.

I am not a beauty product maven by any means, but occasionally I run across things that work pretty well for me. If you don't have an Ulta store near you, you can go to their website to find these (and lots more).

The first is called Cooling Eyeshadow. I haven't used a cream eyeshadow in years, so they must have been improved since... oh, say the 70s. It comes in three colors, Sunkist Pink, Bronze Shimmer, and Gold Glow. Pink shadow makes women my age look like we've been crying, so I chose the Gold Glow. It goes on with a slight "cooling" sensation, easily blends and all I need is a touch of liner and some mascara and it's a simple, less-than-five-minute look that I have been wearing all summer.


The second product is Ulta's own mineral makeup. I decided to try mineral makeup a while back, but I was very dubious at first. After all, they tell women of a certain age that powder tends to settle into fine lines, making us look older. Egad, anything but that. However, this type of makeup provides good coverage without any kind of heavy feeling and low and behold it's nothing like wearing powder. Bonus, the minerals are supposed to have some extra goodies like antioxidants that are actually said to improve the condition of the skin. I was a convert, but OUCH, the Bare Minerals I was using was pretty pricey, $25.

When I ran out of the Bare Minerals, I noticed that Ulta had come out with their own brand, and at $14, it was tempting. It came in fewer colors but one that matched what I was using so I grabbed it. What's the worst that could happen? I notice no real difference in the way the Ulta mineral makeup goes on, the coverage is the same and it feels as lightweight as the expensive stuff. I actually like the Ulta packaging better, because it has a transparent, domed lid, which is where I put the powder on the brush. It's not often you find something cheaper that works the way the expensive stuff does.

Both lines are available at Ulta, so you could try both yourself and see if you notice a difference. I will take the savings and go have myself a double-shot Brevé instead!

July 19, 2006

Keep it neat. Use a tray.

I can’t claim this idea as my own, but I do use it and it works. It came from a little book someone gave me called
“Simplify Your Life: 100 Ways to Slow Down and Enjoy the Things That Really Matter”
by Elaine St. James. The book has a lot of practical tips you can implement, and some others that are less practical for the way we live.

The goal of this particular tip is to reduce the number of times you have to vacuum (a good goal in my life) by reducing the amount of crumbs, drips and messes created when the family takes food into the family room.

Truth is, many of us eat meals and snacks in front of the television, and it’s not very realistic to demand that they eat only in the dining room. So, as the book suggests, I initiated the “Tray Program.” Every time we took our meals or a snack into the family room, we put everything on a tray. The tray went on the ottoman or our laps, forming a “TV tray.” The bonus of the Tray Program is that you actually have everything you need right on your tray – your food, your drink, silverware a napkin and even salt and pepper. So, you aren’t running back and forth to the kitchen. When dinner’s over, the trays simply get a wipe-down and they’re put back. Notice how many crumbs and drips are on the trays, and you’ll realize that those crumbs and drips could have been on your furniture or floor.

I had some fun with this. I went to a few antique stores and found some nostalgic old metal trays that were very inexpensive – less than $8 a piece. I started collecting them in just about every shape and size. Some are the “full meal” size, and some are just right for a snack and a pop. You could snap up some cute plastic trays at Kmart or Wal-Mart and they would work great, too. Stash them away or keep them out in sight, either way just insist that every time someone takes food out of the kitchen it goes on a tray.

When someone calls you a “neat freak” or OCD, just smile and thank them and imagine how much more they have to vacuum than you do.

July 12, 2006

No-crust Broccoli and Ham Quiche


This is a very slight modification of recipe for no-crust quiche. Perfect for low-carb eaters, they turned out puffy, golden brown and delicious.

You'll need:
1 package (10 ounces) frozen broccoli florets
3-4 slices of deli ham, cut up
6 large eggs
1/2 cup half-and-half
About a cup of crumbled sharp cheddar cheese
Salt & pepper to taste

How to:
Preheat your oven to 350º.

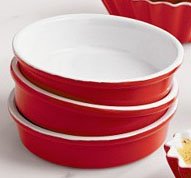
Spray four ramekins with non-stick spray. I used these little creme brulée dishes from Crate & Barrel (shown). The recipe filled four just perfectly, and they looked even more like little individual quiches.

Microwave the broccoli, then drain and let cool while you combine the eggs, half and half, cheese, ham and s&p. Cut the broccoli into smaller pieces if you need to, then add to the egg mixture.

Put the ramekins on a rimmed cookie sheet and ladle the egg mixture evenly into each one.

Bake for about 40 minutes until puffed and golden brown.

There's really nothing to it. I have three left over, which I took out of the ramekins and put in plastic for breakfasts for the next few days. I think they should reheat pretty well in the microwave.

This is one of those recipes I can see myself changing up, substituting vegetables and cheese for a different flavor profile. Instead of the broccoli I could see using fresh zuchinni or asparagus or a carmelized onion.

Update: Reheated one for about 1.5 minutes in the microwave this morning and it was just delish. My next experiment will be to freeze them, which should work fine because regular quiches can be frozen for about a month after baking. A bunch of these in the freezer and I won't have to worry about breakfasts during the work week!

Second Update 7/26: I have made this recipe three times now, once with asparagus and once with just ham and cheese. The plain ham and cheese tempted Bob to try them, and he's hooked. I will be making these on a very regular basis.

On another note, I decided to research the origin of the recipe. I had originally seen this recipe on a blog and the author credited it to Martha Stewart. It may have been originally hers, but crustless quiche recipes are all over the place, popular on low-carb recipe sites as well as mainstream cooking sites. So, if it was Martha's to start with, it's everyone's now. Bon appétit!

July 11, 2006

Rachael Ray is looking for tips from US!

Submit Your Tip to Everyday with Rachael Ray!

If you have a hot kitchen tip, submit it on Rachael Ray's "Everyday" website for a chance to get a free year's subscription to the magazine AND get your tip published. I tried my hand with this idea:

"This has become such a natural for me I didn't even think of it as a "tip" until now! I keep a little set of four vintage dessert plates stacked up on the counter next to my stove to use as spoon rests. When I'm cooking a big meal and need more space for utensils, I just slide the top one off, and there's the next clean one in line. I'm never out a place to rest my spoon or tongs when one of the little plates is in the sink or dishwasher. Note: I think a set of old mismatched saucers would work too, and mixing up the patterns to match your decor could be fun."

July 10, 2006

Mini Review – 16 Blocks

16 Blocks (2006)

Moral of the story: Don't stop at the liquor store with only 12 more blocks to go.


Not particularly original - bad cops, good cop, mouthy witness - but I liked it. Bruce Willis is not the quintessential do-gooder in this flick, instead, he's a former cop-on-the-take-turned-alcoholic who is trying to prevent his former bad-cop partners from killing the witness to save their own skins. Frankly, it looks at times like Willis' character Jack Mosley, is trying to commit semi-slow suicide the odds are so stacked against him. So, it's a little contrived. So, it's pretty predictable. So, crime never pays. I still recommend it b/c it's an entertaining, solid movie that draws you in as far as it goes (which is about "that" far). Lots of shootings, people cuss some, but surprisingly it is only PG-13.

June 28, 2006

Steak Cooking Chart


Earlier when I was writing the "French Country Steak" recipe, I remembered an old meat cooking method my mom had told me about. She said that you knew when to flip the steaks when "the blood came up." The fact is, that always works for me, because it's a visible sign of when I should turn. It produces a medium steak every time.

I realized that whole "blood" thing sounded a little crazy so I did a search to see if I could find any corroboration of that tip. Turns out she was right.

Check out Ask the Meatman™. This site describes it as "meat juices bubbling up through the steak" and "moisture pooling on top surface." I suppose that sounds a bit more appetizing than "blood coming up," so I changed my previous post.

The chart on this page seems to be farily foolproof if I think about how my mom used to cook steaks. You watch the steak for how much "juice" is coming up, and turn it according to how done you want your steak. For more well done, you just leave it longer on the second side.

The other hot tip is that you never want to turn a steak over and over. The Meatman™ says that dries out the surface of the steak. No matter how bad I want to flip and flip, I will restrain myself! It will mean a better steak!

Perfecting the recipe for "French Country Steaks."

Here's a slight modification to the "French Country Steaks" recipe I wrote about earlier. This was actually an improvement over the original recipe, and I will for sure make it just this way again with no changes.

One note. I have discovered that all cube steaks are not alike. I think the success of this last batch was due in part to the fact that the steaks were a bit thicker, and obviously just better quality meat.

That being said, here was the revised recipe:

You'll need:
4 cube steaks
2T olive oil
1 garlic clove
1 can French onion soup
1 8-oz. container sour cream
1 lb. sliced mushrooms
salt, pepper, Mrs. Dash original

How to do it:

1. Salt & pepper both sides of the steaks, then sprinkle with Mrs. Dash original spice blend (yes, I am addicted to this stuff now).
2. Run about 2 T olive oil around a pretty big, deep skillet (with a lid you will need later) and let it heat over high heat.
3. Put the steaks in (don't crowd the pan), don't cover and don't bother them.
4. Meanwhile cut up one large or a couple small cloves of garlic.
5. When moisture pools up on the top of the steaks, flip 'em. Then leave them alone again.
6. When you see moisture on the second side, take the steaks out and put them on a plate and loosely cover w/foil (not tight). They will be medium at this point.
7. Add 2T butter and the garlic to the pan. Wilt the garlic, but don't burn it.
8. Add the French onion soup, undiluted. Stir, scraping up the brown bits.
9. Whisk in the sour cream.
10. When it's smooth and bubbling, add the steaks back in (and the juice from the plate). Turn them once to coat with the gravy.
11. Toss 1 lb. fresh sliced mushrooms all around the pan and on top of the steaks. – I bought mine already sliced to make it faster.
12. Cover and turn heat to low & simmer for about 15 minutes.

For Bob, I served w/biscuits and noodles to sop up the gravy. I had mine with some steamed cauliflower that I poured gravy on and it was low carb and delicious.

I am thinking you could use the same basic principles but give it a different twist if you used a can of diced tomatoes instead of the French onion soup added some diced onion in with the garlic and changed the mushrooms to sliced green peppers. That would make more like a Swiss steak.

There may be other alternatives... Have fun, be creative! The worst that happens is you throw it out and order in. After all, cube steaks hardly break the bank!

June 22, 2006

Update on Mrs. Dash Butter

As a follow up to my previous article about mixing Mrs. Dash seasoning blends into butter for use on corn, I am happy to report that other seasoning blends work equally well to the original blend. I used a capful of the Southwest Chipoltle blend and mixed it into 6 T of softened butter. I again slathered it on some sweet corn and wrapped the ears in foil and threw them on the grill, and we also put a pat on our steaks. Delicious. Why would I ever go to the trouble of mixing my own spices for a quick seasoned butter when these blends work very well and taste great.

Thought you should know.